Woman’s Tennis Organisation


Woman’s Tennis Organisation

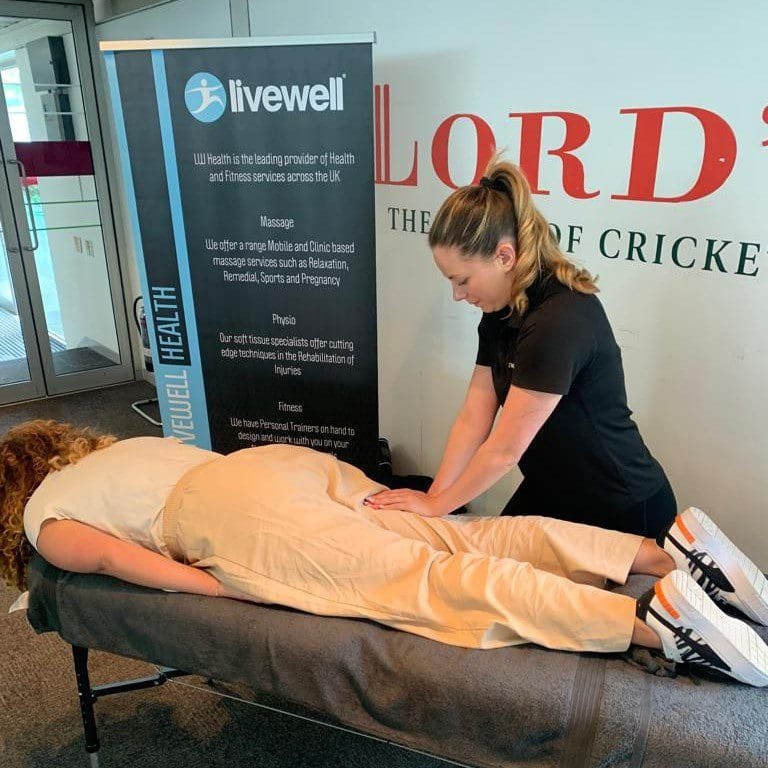
Our Senior Sports Therapist Alison, recently travelled to London to conduct a corporate event for the inspirational athletes of the Woman’s Tennis Organisation. Alison was on hand all day providing pre or post match massages, while also working pitch side & reporting on the conditions of the court. As well as this she was able to assist the athletes with any injuries or worries they were dealing with while playing. Overall, it was a great day & we were provided with amazing feedback from the Tennis players. We want to thank the Woman’s Tennis Organisation for hosting us for the day and we hope they all had a great time!

LiveWell Health currently work with a number of events throughout the UK from large sporting events like the World Tennis Championships through to the London Marathon, Wolf Run and many more of all sizes. Our event recovery services, whether it be specific on site post event massage or whether your looking for a full recovery option with our LIVE|Recover recovery hub, are some of the best in the industry. Our recovery hub service, which is a mobile recovery suite of elite level recovery products and services. For further information please contact us or use our event booking form.


Alison’s 5 Years with LiveWell Health!

Congratulations Alison!

Happy 5 year LiveWell Anniversary to our longest serving member Alison. Alison is a vital member of LiveWell Health, who managed to work her way up to Senior Sports Therapist due to all of her hard work over the years. Loved by the all the therapists & her many clients, we are proud to have Alison as part of our team. Thank you for all your hard work, dedication & loyalty, we look forward to working with you for many years to come.

Volvo Corporate Event


LiveWell Health Brings Wellness to Volvo Headquarters

Recently, LiveWell Health had the pleasure of visiting Volvo Headquarters to conduct a corporate wellbeing event for their staff and clients. The day was a tremendous success, with our talented therapists providing on-site chair massages that left everyone feeling rejuvenated and appreciated. The team at Volvo welcomed us warmly, and we are grateful for the opportunity to contribute to their well-being.

A Special Day for Volvo

Our therapists expertise and dedication made a significant impact, ensuring that each participant experienced the full benefits of our massage services. The feedback from the Volvo staff and clients was overwhelmingly positive, highlighting the value of incorporating wellness into the workplace. It was a privilege to help make their day special, and we hope everyone enjoyed the relaxation and stress relief that our services provided.

What We Do

At LiveWell Health, we excel in providing a wide array of corporate wellness services throughout the UK. Collaborating with many prominent companies, we deliver customised Corporate Employee Benefits and Wellness Days to suit individual requirements. Our offerings range from basic back and neck massages during office hours to extensive team-building events and weekend retreats. Our team comprises certified massage therapists, physiotherapists, and personal trainers, enabling us to offer a comprehensive and holistic approach to health and well-being.

Customisable Wellness Solutions

Whatever your corporate wellness needs, LiveWell Health has a range of services and options to design the perfect day for you and your staff. Our goal is to reduce stress and enhance productivity by creating a happy and healthy work environment. Whether through invigorating massages or engaging team-building activities, we are committed to helping your team thrive.

We look forward to continuing our collaboration with Volvo and other corporate clients, bringing the benefits of wellness directly to the workplace. Thank you, Volvo, for hosting us, and we can’t wait to work with you again!

If you are a business looking for some employee incentive ideas, please contact our team today for further information.


Understanding Food Allergies and How to Manage Them

Food allergies are a common and often challenging health issue that affects millions of people worldwide. These allergies occur when the immune system mistakenly identifies certain foods as harmful and triggers an allergic reaction. Symptoms can range from mild to severe and may include itching, swelling, hives, digestive problems, and in extreme cases, anaphylaxis—a life-threatening condition requiring immediate medical attention.

Common allergens include foods such as peanuts, tree nuts, milk, eggs, wheat, soy, fish, and shellfish. The severity of reactions can vary greatly from person to person and even from one exposure to the next. Understanding and identifying these triggers is crucial in managing food allergies and maintaining a healthy lifestyle.

One of the most effective ways to identify food allergies is through IgE blood testing. This method measures the levels of specific IgE antibodies in the blood that are produced in response to certain allergens. With accurate and scientific analysis, individuals can pinpoint the exact foods or environmental factors causing their symptoms. This knowledge empowers them to make informed decisions about their diet and lifestyle, avoiding potential allergens and reducing the risk of allergic reactions.

Managing food allergies involves more than just avoiding certain foods. It requires a comprehensive approach that includes reading food labels carefully, communicating your allergies to restaurant staff, and being prepared for emergencies with medications such as antihistamines and epinephrine auto-injectors. Support from healthcare professionals and dietitians can also be invaluable in creating a safe and balanced diet.

If you suspect you have a food allergy, booking a test with us is a simple and effective first step. Our home-to-lab finger-prick blood test is designed for convenience and accuracy. Simply collect a quick sample at home and send it to our laboratory. Within 7 days, you’ll receive detailed results that reveal your IgE reactions to 23 foods and 19 environmental allergens. This test is available for individuals aged 4 and older, except those who are pregnant or breastfeeding. Available exclusively in the UK, our testing service provides you with the information and support needed to manage your allergies effectively. Take control of your health today by scheduling your allergy test with us.

If you need help with any aspect of your health, such as personal training or nutrition then please contact our team today.

Plantar Fasciitis

In the bottom of the foot there is a thick fibrous tissue known as the plantar fascia. The plantar fascia provides stability for the foot and also works as a shock absorber. Injury to the plantar fascia can lead to an aching sensation on the bottom of the foot when walking, especially after long periods of rest. The term plantar fasciitis refers to inflammation on the sole of the foot.

Plantar fascia injuries are most common in individuals who do lots of exercise such as running, jumping and dancing, involving lots of impact on the bottom of the feet. Treatment methods such as massage and rest can help alleviate the painful symptoms. Painful symptoms may ease on their own but if they still remain after 2 weeks, consult a professional.

Anatomy

The plantar fascia is a long, thick fibrous tissue connecting to the calcaneus (heel bone of the ankle) it runs along the bottom of the foot and divides into five digital bands, along the heads of the metatarsals (toes). It covers the sole of the foot.

The function of plantar fascia is to provide support to the foot when standing and shock absorption when running.

Inflammation or degeneration of the tendon where the fascia originates can cause heel pain.

Symptoms

The symptoms of plantar fasciitis will be aggravated by continuing activity on the sole of the foot such as walking/running and will get worse over time. Some of the symptoms of plantar fasciitis include:

  • Pain on the bottom of the foot, around the heel and the arch (main symptom)
  • May be tenderness/pain under sole of foot and under heel when pressing in
  • Eases pain when exercising, but painful once rest
  • Difficult to raise toes off floor
  • Pain occurred gradually
  • Pain worse first thing in morning/when walking after long periods of rest
  • Pain eases off only to return later
  • Pain directly under the heel
  • Flat or overpronated feet
  • Tight calves

Causes

Plantar fasciitis is directly caused by damage to the plantar fascia running along the sole of the foot.

Some examples of causes/links consist of:

    • Overuse
    • Recently started exercising on hard surfaces
    • Exercising with a tight calf or heel
    • Overstretch the sole of your foot during exercise
    • Recently started doing a lot more running, walking or standing up
    • More common in sports involving running, dancing or jumping
    • Foot biomechanics
    • Overpronation (foot rolling in/flattening too much when running or walking which stretches plantar fascia more than normal)
    • High arch – unable to absorb as much shock so increased strain on plantar fascia
    • Footwear – very flat and unsupportive shoes increase likelihood of developing plantar fasciitis
    • Bodyweight – overweight individuals or those that do lots of heavy lifting causes increased load on feet increasing chances of developing heel pain

Flexibility – if have tightness in the calves or plantar fascia this can alter the biomechanics in the foot causing strain on the fascia

Diagnosis

During your visit to your local GP or Sports Therapist / Physiotherapist, they will assess..

      • History- how long the pain has been occurring for and when its most painful
      • Physical examination- check for tenderness in foot, pain during palpation
      • Gait analysis- analysing feet and how they function when walking and running- if overpronate or feet flatten

Treatment

Aims to decrease pain and inflammation, identify and correct possible causes, improve flexibility, gradually increase strength and return to full fitness levels.

  • Rest- rest from activities causing the pain reduces initial pain and inflammation
  • Massage – can help stretch and relax the plantar fascia. Massage also helps to stimulate blood flow and loosen tight tissues underneath the foot which cause pain
  • Stretches – for calf muscles and plantar fascia
  • Night splint – compliments plantar fasciitis exercises by preventing the tissues from tightening up overnight. Wearing a night splint is more effective than stretching exercises alone.
  • Taping- supports the arch of the foot and reduces strain on the plantar fascia
  • Shock Wave Therapy – method of therapeutic treatment for soft tissue injuries- works by passing shock waves into the tissues
  • Ultrasound – transmits high frequency sound waves into the tissues- has a micro massage effect and can reduce pain and inflammation
  • Footwear – wear comfortable trainers with good cushioning- avoid hard, flat soles
  • Cold therapy – ice massage or application of an ice pack for 10 minutes every hour for the first day- reduce to 3-5 times a day as symptoms ease
  • Medication – doctor may prescribe NSAID’s (Nonsteroidal anti-inflammatory drugs) e.g. ibuprofen in the early stages – always check with a doctor before taking any medication
  • Orthotics (shoe insoles) – for overpronated feet if feet roll in or overpronate it can cause strain on the foot should be worn at all times, not just when training
  • Surgery – rarely needed but is used when all other treatments haven’t helped. 

Exercises

The best way to treat plantar fasciitis is firstly to rest. If pain allows, some stretching exercises can help improve symptom’s and alleviate some pain.

  • Foot rolling – rolling the foot over a round object such as a ball, weights bar, rolling pin or can of soup can stretch the plantar fascia. Roll the foot repeatedly over the object, applying increasing downward pressure. You can also apply an object that can be cooled in the freezer (bottle or metal can) to apply cold therapy at the same time – 10 minutes per day until walking in the mornings is pain-free.
  • Calf stretches – stand facing a wall with one foot in front of the other, the front knee slightly bent, and the back leg straight. Keep both heels on the ground and lean into the wall, feeling a stretch in the calf of the straight leg. Hold for 20-30 seconds, then switch legs and repeat. 
  • Soleus stretch – Stand in the same position as the calf stretch, with one foot in front of the other. This time bend both knees while keeping both heels on the ground. Lean into the wall, feeling a stretch in the lower part of the back calf. Hold for 20-30 seconds, then switch legs and repeat. 
  • Stretching on a step – stand with toes on step and heels off the back, lower heels down below the level of the step until a stretch is felt- hold for 15-20 seconds- further stretches calves and Achilles
  • Towel Scrunch – While sitting, place a towel on the floor with your foot on top of it. Try scrunching up a towel with your toes like you are trying to pick it up off the floor

No running!

Try to maintain fitness by swimming or cycling & you can begin to start walking again when there has been no pain for at least a week, slowly increase the distance and speed.

Prevention

  • Stretching – make sure to keep up the stretching of the lower body to prevent strain on the fascia
  • Footwear and Insoles – try to wear shoes that are supportive for the sole of the foot and absorb shock with cushioning
  • Ease into more intense exercise gradually – start by walking and gradually increase the amount as time goes on, then eventually ease back into running when pain is eliminated
  • Keep a healthy lifestyle and your weight under control as excess weight can increase the amount of stress on the foot

Frozen Shoulder

Frozen shoulder (also known as adhesive capsulitis or periarthritis) is used to describe the condition where the glenohumeral joint of the shoulder is stiff and painful. It occurs in about 2-5% of the general population, with a higher prevalence among elderly individuals and those with diabetes. Frozen shoulder is a benign and self limiting condition, usually lasting for 1-3 years, in 20-50% of patients the stiffness and pain only partially resolve, which leads to long lasting effects of shoulder mobility impairment and reduction in sleep quality. Commonly patients who suffer persistent symptoms (over 4-5 years) only suffer mild long term effects.

Anatomy

The hallmark pain and stiffness are caused by the formation of adhesions or scar tissue in the glenohumeral (GH) joint. The GH joint is a ball and socket joint between the scapula and humerus, connecting the upper arm to the trunk. Under normal conditions this joint is one of the most mobile in the human body, allowing for a large range of motion in multiple planes. In the case of frozen shoulder the adhesions limit this range of motion and make movement painful.

Symptoms

There are 4 recognised clinical stages of the condition:

  1. Painful stage- moderate pain and reduction of movement lasting less than 3 months
  2. Freezing stage- severe pain and reduction of movement lasting 3-9 months 
  3. Frozen stage- pain may be present but stiffness predominates lasting 10-14 months
  4. Thawing stage- minimal pain and gradual improvement in movement lasting 14-24 months

Causes

The cause of frozen shoulder is still unclear. Historically researchers into the aetiology of the condition have shown that it is characterised by a thickened, tight capsule with chronic inflammatory cells and fibroblasts found in the joint capsule. It can occur as a primary idiopathic condition or secondary to medical conditions or trauma.

Diagnosis

Frozen shoulder is diagnosed by testing positive to three characteristics:

  1. Insidious onset of severe pain over a period of months, night time pain is a common feature 
  2. Shoulder stiffness with markedly reduced external rotation 
  3. Negative radiographic findings

Some patients describe the pain as a deep ache, poorly localised and non specific without any point of tenderness. In others it presents as a pain which refers to the deltoid origin and radiates down to the bicep area. Manual testing will often return normal rotator cuff strength but a greatly reduced passive and active range of motion. 

In some cases laboratory tests may be carried out to identify or rule out underlying conditions. Radiographs of the shoulder will also return normal with a patient suffering from frozen shoulder, but may be carried out to exclude conditions such as shoulder dislocation, GH arthritis or calcific tendinopathy.

Treatment

There is no universally accepted intervention which is viewed as the most effective treatment for restoring motion and reducing pain. 

Non-surgical or conservative management is preferred with most patients improving in 6-18 months. This includes analgesics, oral steroids, physical therapies and supra-scapula nerve block. Physical therapy, from a sports massage and remedial therapist or physiotherapist, has traditionally been the first choice of treatment for frozen shoulder. The therapist can work to reduce pain, mobilise the joint and provide the patient with a supervised  stretching and strength maintenance programme.

Exercises

Exercises should be carried out under the direction of a qualified therapist and vary according to the stage of the condition. 

  1. Early Freezing Stage: Gentle and Short Duration Stretches

    1. Pendulum Exercises
      • Purpose: Promote gentle movement in the shoulder joint, reducing stiffness without causing pain.
      • How to Perform:
        • Lean forward with your unaffected arm supported on a table or chair.
        • Let your affected arm hang down loosely.
        • Gently swing your arm in small circles, or forward and back, using your body to initiate the motion.
        • Perform for 1-2 minutes, gradually increasing the range of motion as tolerated.
    2. Passive External Rotation
      • Purpose: Maintain range of motion by gently stretching the external rotators of the shoulder.
      • How to Perform:
        • Lie on your back with your arm close to your side and elbow bent at 90 degrees.
        • Use your unaffected hand to gently push your affected arm outward, rotating it externally.
        • Hold for 10-15 seconds, then relax and repeat, avoiding any pain.
    3. Supine Passive Forward Elevation
      • Purpose: Improve shoulder mobility by gently stretching the shoulder in a pain-free range.
      • How to Perform:
        • Lie on your back with your affected arm by your side.
        • Use your unaffected hand to slowly lift your affected arm overhead, keeping it straight.
        • Hold at the top for a few seconds, then slowly lower it back down.
        • Repeat, ensuring the movement remains gentle and within a comfortable range.

    Later Frozen Stage: Strengthening Exercises

    1. Isometric External Shoulder Rotation
      • Purpose: Strengthen the shoulder’s external rotators, stabilising the joint without moving it.
      • How to Perform:
        • Stand with your elbow bent at 90 degrees, and press the back of your hand against a wall or door frame.
        • Push outward against the wall without moving your arm, holding the tension for 10-15 seconds.
        • Relax and repeat, ensuring no pain occurs during the exercise.
    2. Posterior Capsular Stretching
      • Purpose: Stretch the tight posterior capsule of the shoulder, improving internal rotation and overall flexibility.
      • How to Perform:
        • Bring your affected arm across your body at shoulder height.
        • Use your other hand to gently pull your arm closer to your chest, stretching the back of your shoulder.
        • Hold the stretch for 20-30 seconds, then release and repeat.

    Thawing Stage: Combined Strength and Stretching Exercises

    1. Combined Strength and Stretching Exercises
      • Purpose: Enhance overall shoulder function by combining strengthening with stretching, gradually increasing range of motion and strength.
      • How to Perform:
        • Incorporate exercises like active external rotations, shoulder abduction, and flexion against light resistance bands or weights.
        • Alternate between strengthening movements and stretching exercises like doorway stretches or wall slides.
        • Increase the frequency and intensity as tolerated, aiming for 2-3 times daily.

Prevention

As the aetiology of the condition is still unknown advising on how to prevent an incidence of the condition is difficult. Research has suggested that prolonged immobilisation or limited use of the shoulder joint may contribute to the likelihood of developing frozen shoulder. With this in mind regular balanced exercise and stretching can help to maintain the structural support and mobility of the GH joint.

Temporomandibular Disorders (TMD)

Temporomandibular disorders (TMD) are conditions which affect the movement of the jaw. They are sometimes referred to as TMJ disorder or TMJD. It can cause facial pain, tenderness and difficulty moving the joint. TMD is believed to affect up to 15% of adults, with peak incidence at 20 to 40 years of age, more commonly found in women. TMD is treatable, but can have many different causes which can make diagnosis a challenge. Once diagnosed most patients can be successfully treated at home using methods such as reducing stress and changing posture.

Anatomy

TMD refers to a group of disorders affecting the Temporomandibular Joint (TMJ).

This joint connects your lower jaw (mandible) to your skull. It is located bilaterally (on both sides of your head) just in front of your ears. The function of this joint is to open and close your mouth, allowing you to eat and speak.

The TMJ is a hinge joint which allows for precise and complex movements of the jaw.

Symptoms

The symptoms typically present, either on one or both sides of the face:

  • Pain in the face or neck
  • Limited jaw range of motion and/or locking of the joint
  • Stiffness in the jaw muscles
  • Clicking or popping from the TMJ area
  • Malocclusion (a shift in jaw position)

Causes

There is no single specific cause for TMD, but some conditions are believed to contribute to developing a disorder. These include arthritis, joint erosion, clenching or grinding of the teeth, congenital structural jaw problems and trauma to the jaw. It is also thought that prolonged stress and poor posture which puts extra strain on the muscles of the face and neck are associated to the development of TMD.

Diagnosis

There is no standard test for TMD, you may be referred to an ENT specialist for a diagnosis. They may physically examine your jaw for swelling or tenderness and possibly carry out and X ray, CT scan or MRI to assess the structure of your jaw.

Treatment

Most TMD patients are treated conservatively, using pain medication, ice to reduce pain and swelling and reducing jaw movements by eating soft foods and avoiding chewing gum.

Many find that physiotherapy or sports massage therapy can support treatment for TMD. Your therapist can manipulate the muscles surrounding your jaw and neck, thereby relieving the tension in your TMJ. They can also provide you with exercises the stretch the muscles around your jaw, optimising joint movement. As stress and upper body posture is believed to be a contributing factor in TMD you may find that regular massage treatments can help you to manage your condition.

In extreme cases your GP or ENT specialist may advise corrective dental treatment if this bite alignment is an issue or arthrocentesis if fluid and debris needs to be cleared from the joint.

Exercises

There are many different exercises which can be used to help TMD. Your Physiotherapist or Sports Massage Therapist will be in a better position to advise which are best for you, but here are a few examples that they may ask you to carry out.

Goldfish Exercise:

Press your tongue to the roof of your mouth. Then place one index finger on your left TMJ and the other index finger on your chin. Apply light pressure on each finger, drop your chin so that your mouth opens, but tongue stays in contact with the roof of your mouth. Repeat with the right TMJ.

Chin Tucks:

Stand or sit tall then bring your head backwards, tucking your chin in towards your chest. Keep your head straight, it might help to focus on a point or object straight in front of you.

Jaw Stabilisation:

Keep your jaw in a neutral position and then partially open it, about the width of the top of your thumb. Apply gentle pressure with your hand, first on the left then right then at the bottom of your jaw. Resist the pressure to keep your jaw stationary.

Prevention

As TMD have no specific cause it can be difficult to prevent their occurrence. You may find it helpful to use a mouth guard at night or use muscle relaxants (under the supervision of your GP) if you are prone to teeth grinding. Physio or sports massage therapy can help to optimise your posture and avoid excess pressure on your TMJ. It is also advisable to reduce, or manage, stress levels and anxiety. This can be achieved through regular exercise, massage treatments, diet and counselling.

Lumbar Disc Herniation

A herniated disc, also known as a slipped or bulging disc, is a relatively common pathology often occurring in people aged 30 to 50. The intervertebral  discs play a crucial role in the spine acting as a shock absorber between the vertebrae, as well as allowing for a wide range of movement. Disc herniation refers to a condition in which the spinal discs become damaged & encroach on the nerve roots branching off the spinal cord. This can happen anywhere along the spinal column but often occurs in the cervical or lumbar region, due to the wide range of movement in these areas causing more wear & tear on the discs. For most people a slipped disc is extremely painful due to the nerve compression, however some people don’t even feel that it has happened.

Anatomy

The Spinal column is made up of 24 individual interlocking bones known as vertebrae. These vertebrae are split into 3 different sections consisting of 7 Cervical, 12 Thoracic & 5 Lumbar, followed by the Sacrum & Coccyx. Even though the vertebrae in each section look different they all have the same functional components; the body for load bearing, the vertebral foramen to protect the spinal cord & the transverse processes for ligament attachment. In between these vertebrae the intervertebral discs are found, protecting the bones by absorbing shock from body weight, trauma & daily activities such as walking, lifting or twisting.

Spinal discs are made up of 2 parts, a soft gel-like inner portion called the nucleus pulposus & a tough outer ring known as the annulus fibrosus. The nucleus pulposus, mainly consisting of water plus loose networks of collagen fibers, is where shock absorption primarily takes place. Surrounding this inner core, the annulus fibrosus is composed of tough ligamentous fibers which protect the nucleus pulposus, as well as securely connecting the vertebrae above and below the intervertebral disc. 

Causes

A herniated disc occurs when excess pressure is placed on the disc causing the annulus fibrosus to become weak. This weakness can then cause bulging, cracking or ruptures within the annulus fibrosus allowing the nucleus pulposus being able to “leak” through & compress against the nearby nerve roots. The result, intense pain in the lower back followed by shooting pains into the buttock & down the leg. 

The main factors that can increase the risk of a herniated disc are:

  • Age – Over time the intervertebral discs naturally start to lose the fluid which normally allows them to stay pliable and spongy between the vertebrae, this is known as disc degeneration. This dehydration of the discs causes them to become stiff and unable to withstand strenuous compression, leaving the annulus fibrosus more susceptible to bulging or rupturing even from the slightest of movements. 
  • Lifting heavy objects repetitively or incorrectly – Lifting heavy objects can place excessive strain on the lower back which can cause a herniated disc. Especially when they are lifted without correct technique, predominantly using your back muscles instead of your legs to lift combined with a twisting motion overstress the discs increasing risk of herniation. If you have a physically demanding job, the repetitive nature of the role can also increase the risk and your placing this strain on the disc over and over. 
  • Obesity – Excess weight increases the stress on the lumbar spine making individuals who are overweight more likely to herniate a disc. 
  • Smoking – Experts suggest that putting nicotine into your system limits the blood flow to the discs causing them to break down quicker, speeding up degeneration therefore increasing the risk of herniation. 
  • Trauma – The least common cause of disc herniation is trauma, a serious fall or accident can lead to this pathology but is less common than the other factors.

While all these factors can increase the risk of lumbar disc herniation anyone at any time could herniate a disc.

Symptoms

Signs & Symptoms tend to vary depending on where the herniated disc is situated & the level of herniation. Typically only affecting one side of the body, symptoms can range from moderate lower back pain to extreme pain & numbness going all the way down the leg.

  • Lower back pain
  • Pain often down one leg from the buttock into the thigh & calf.  
  • Numbness, tingling or burning sensations due to nerve compression
  • Pain that worsens at night 
  • Pain that worsens with certain movements such bending or sitting
  • Muscle weakness
  • Sciatic pain
  • Difficulty lifting the foot (Foot Drop)
  • Pain when standing from a seated position

Pain normally eases within six weeks, but during this short duration pain can be severe making daily activities difficult to participate in. However not all herniated discs can cause symptoms, as the herniation may not be compressing on a nerve & therefore not radiating any pain.

Diagnosis

If you believe this is a pathology you may be suffering with you should consult with a healthcare professional so they can conduct a thorough assessment. They will ask about your symptoms, medical history & when/how the pain started. After this a physical exam would be performed to find the source of the pain and discomfort. They will also assess your muscular strength and discover what movements trigger the pain. A herniated disc may be suspected if pain starts in the lower back and is then accompanied by radiating pain down the leg. In order to confirm this more tests can be performed, these include:

  • Straight Leg Raise Test – While lying on your back & keeping your legs straight, your healthcare professional will slowly raise your affected leg until symptoms occur. If pain is felt during 30 to 70 degrees of hip flexion this indicates lumbar disc herniation. If you have a herniated disc compressing on a nerve, this particular movement recreates symptoms by increasing this compression therefore resulting in a positive test. You will also be asked if any numbness or tingling is felt down the leg while completing this movement. 
  • MRI (Magnetic Resonance Imaging) – This type of scan usually provides the most accurate imaging of a herniated disc, as it shows the disc, surrounding soft tissue & nerve roots. This allows your healthcare professional to actually see where the herniation has occurred & which nerves are being impinged.
  • X-Ray – These aren’t often used to diagnose herniated discs as the soft tissues structures of the discs & nerves are hard to capture. However, X-Rays are used to rule out any other causes of the pain such as a fracture or bone spur, a tumor or spinal alignment issues. 

Your healthcare professional can then put all this information together to diagnose the cause of your pain & discomfort. However, during the initial assessment, if no serious signs of a herniated disc are found then imaging scans may not be provided at this point. As some professionals prefer to wait & see if symptoms ease on their own within the six weeks.

Treatment

Treatment for a herniated disc can range from minimal pain management to surgical treatment. In most cases lumbar disc herniation often resolves from minimal treatment within six weeks. Your GP may prescribe painkillers or muscle relaxants to relieve short term pain and also refer you to a Physiotherapist/Sports Therapist. Your therapist will then provide you with stretches and exercises for the back and surrounding areas. 

When slipping a disc, or with any injury in fact, initial response is to decrease the pain that you are in, ways to do this include:

  • Rest – Bed rest is ok at first when pain is severe, however this should be limited to a couple of days as any longer than this can cause muscles to become stiff and weak. Heavy lifting & intense exercise however should be avoided for the first six weeks.
  • Ice – Applying ice after initial injury can help to ease pain by reducing inflammation & muscle spasms associated with disc herniation. 
  • Pain Medications – Over the counter painkillers can help to treat pain & inflammation. Also your GP may prescribe muscle relaxants if spasms get particularly bad. 
  • Heat Therapy – Applying heat to the area after the first 48 hours, with a hot water bottle or by having a nice bath, can help to relax the muscles surrounding the injured area & reduce muscle pain & spasms.
  • Hot & Cold Therapy – Some individuals find maximum relief from using a mixture of hot and cold treatment. For example, applying ice for 10 minutes, immediately followed by a heat pack or hot water bottle for 10 & repeat.

After this you can start to consider more long term solutions for the pathology, this options include:

  • Strengthening Exercises
  • Spinal Manipulations
  • Epidural Injections
  • Acupuncture
  • Massage Therapy

If symptoms do not improve after these treatments & persist longer than six weeks, surgery is then sometimes considered.

Exercises

Provided are some exercises that can help lumbar disc herniation:

  • Back Extension – Lie on your front with your forearms and palms flat on the floor. Slowly lift your upper body up off the floor and hold for up to 30 seconds, aim for 10 reps.
  • Glute Max Stretch – Lie on your back with your knees bent, life one leg off the ground and place the outside of the ankle joint over the opposite knee. Hold the knee of the lifted leg and pull the leg in towards the body and hopefully you should be able to feel the stretch in the buttock region. Hold stretch for up to 30 seconds and try to treat 3 times on each leg.
  • Pelvic Tilts – While lying on your back, place your hands on your hips & roll your pelvis back & forth along the ground. Aim for 10 sets of 3 reps
  • Superman – On your hands and knees slowly lift and straighten your opposite arm and leg. Aim to complete 10 sets of 3 reps.

While completing exercises if any pain or discomfort is felt then stop immediately and rest instead.

Prevention

It isn’t always possible to prevent herniating a disc but here are some steps you can take to reduce your risk.

  • Strengthening exercises – Increasing your core strength can help to stabilise and support the spine, decreasing the stress placed on your discs. 
  • Maintain good posture – Sitting up straight and keeping your back aligned reduces the pressure placed on the discs.
  • Lose weight – If you are classed as overweight losing excess weight can help to reduce wear and tear on your discs as the load being placed on them will be less.
  • Correct lifting techniques – Make sure when you are lifting heavy objects that you are doing it correctly, bend and lift from your legs not your waist.

Rotator Cuff Strain

In the rotator cuff region there are four muscles, tendons and ligaments, surrounding the shoulder which provide added stability to the shoulder joint. This structure helps to keep the bone securely placed into the socket. Injury to the rotator cuffs can cause an ache like pain in the shoulder. This may lead to a feeling of muscle weakness and inability to lift the shoulder above the head. 

Rotator cuff injuries are most commonly presented in people regularly exposed to overhead movements, such as painters, carpenters and builders. Individuals who suffer from this injury can usually manage their symptoms, through sports massage and specific exercises focusing on the rotator cuff muscle region. However, if not treated correctly, further injury to the area may occur such as a complete tear, which may result in surgery.

Anatomy

The rotator cuffs are made up by four muscles, these are the supraspinatus, infraspinatus, teres minor and subscapularis. These muscles aid in keeping the upper arm and shoulder into the socket with stability. They also each allow specific movements at the shoulder joint. The group of four muscles all originate within the shoulder blade, but all insert into different portions of the upper arm bone. 

Supraspinatus: This muscle originates at the supraspinous fossa; the muscle belly passes laterally over the acromion process and inserts into the greater tubercle of the humerus bone. This muscle allows the first 15 degree’s movement of abduction, after this the deltoid and trapezius muscles will then allow further motion. 

Infraspinatus: The origin of the infraspinatus is the infraspinatus fossa, and the insertion is also the greater tubercle of the humerus. The motion created by this muscle is lateral rotation of the shoulder, moving the arm away from the centreline of the body. 

Teres Minor: A small narrow muscle on the back of the shoulder blade which sits underneath the infraspinatus. The origin is the lateral boarder of the scapula. This muscle contributes to external rotation of the arm of the body. 

Subscapularis: This rotator cuff is the strongest and largest out of the three listed above. This muscle originates at the subscapularis fossa and inserts into the lesser tubercle of the humerus. The subscapularis allows greater motion at the shoulder and mainly aids in allowing medial rotation of the arm. 

Symptoms

Common symptoms of possible rotator cuff strain include:

  • Dull ache 
  • Difficulty lifting arm over head 
  • Weakness around the shoulder
  • Disturbed sleep
  • The constant need to use self-myofascial techniques 

Causes

There are a few common risk factors of why rotator strain may occur:

  1. Family History: There may be family history of rotator cuff injuries which may make certain family members more prone to having the injury than others. 
  2. The type of job you do: Individuals who work in construction or manual labour who have repetitive overhead movement of the shoulder could damage the rotator cuff overtime. 
  3. Age: As you get older joints and muscles become weaker, meaning you may be more prone to injury overtime. 

Diagnosis

To diagnose a rotator cuff strain a physical examination will be carried out by a doctor or a physiotherapist. Firstly, they may ask about your day-to-day activities which may determine the seriousness of the injury. The doctor will test the range of movement at the shoulder by getting you to perform movements such as flexion, extension, abduction, adduction and medial and lateral rotation. This will allow the doctor to determine if it is actually rotator cuff strain or whether it may be other conditions such as impingement or tendinitis. 

Imaging scans such as X-Ray’s may also be used to see if there is any abnormal bone growth within the joint, which may be causing the pain. 

Treatment

Treatments for rotator cuff injuries can be non-surgical or surgical. Tendinitis may occur over time from the repetitive strain placed around the joint, so it is important to treat the affected area. 

  • Apply a cold compress/ ice to the effected area to reduce swelling
  • Heat packs can be used to reduce swelling 
  • Resting the affected area 
  • Inflammatory medication such as ibuprofen and naproxen 
  • Reduce the amount of repetitive movement to the joint
  • Don’t lift the arm overhead

Exercises

  • 1. Doorway Stretch

    • Purpose: Stretches the chest and shoulder muscles, helping to alleviate tension and improve flexibility in the shoulder joint.
    • How to Perform:
      • Stand in a doorway and place your arms on the door frame with elbows at 90 degrees and your hands slightly above head level.
      • Step forward with one foot, gently leaning into the doorway until you feel a stretch in the front of your shoulders and chest.
      • Hold for 20-30 seconds and relax.

    2. External Rotation with Weight

    • Purpose: Strengthen the rotator cuff muscles, particularly the infraspinatus and teres minor, which are responsible for external rotation of the shoulder.
    • How to Perform:
      • Lie on your side with your elbow bent at 90 degrees, holding a light weight in the top hand.
      • Keep your elbow close to your body and rotate your forearm upward, lifting the weight.
      • Slowly lower the weight back down and repeat before switching sides.

    3. High to Low Rows with Resistance Band

    • Purpose: Strengthen the muscles of the upper back and shoulder, improving stability and support for the rotator cuff.
    • How to Perform:
      • Anchor a resistance band above shoulder height.
      • Hold the band with both hands and step back to create tension.
      • Pull the band down and back toward your hips, squeezing your shoulder blades together.
      • Slowly return to the starting position and repeat.

    4. Reverse Fly’s

    • Purpose: Target the posterior deltoids and the upper back muscles, which help support and stabilise the shoulder joint.
    • How to Perform:
      • Stand with feet hip-width apart and a slight bend in your knees, holding a light weight in each hand.
      • Bend forward at the hips with your back flat and arms hanging down.
      • Raise your arms out to the sides until they’re level with your shoulders, squeezing your shoulder blades together.
      • Lower your arms back down and repeat.

    5. Lawn Mower Pull with Resistance Band

    • Purpose: Strengthen the shoulder and back muscles, mimicking the movement of starting a lawn mower, which engages the rotator cuff.
    • How to Perform:
      • Anchor a resistance band at ground level.
      • Stand with one foot forward and grab the band with the opposite hand.
      • Pull the band up and back diagonally, rotating your torso and mimicking the motion of starting a lawn mower.
      • Slowly return to the starting position and repeat before switching sides.

    6. Isometric Internal Rotation

    • Purpose: Strengthen the subscapularis muscle of the rotator cuff without moving the shoulder, which is helpful when active movement is painful.
    • How to Perform:
      • Stand next to a wall with your elbow bent at 90 degrees, holding a small towel or cushion between your forearm and the wall.
      • Press your forearm into the wall, engaging the internal rotators of the shoulder.
      • Hold the tension for 10-15 seconds, then relax and repeat.

    7. Isometric External Rotation

    • Purpose: Strengthen the external rotators (infraspinatus and teres minor) of the rotator cuff without movement, useful for stabilising the shoulder.
    • How to Perform:
      • Stand next to a wall with your elbow bent at 90 degrees, this time with the back of your hand pressing against the wall.
      • Push your hand outward into the wall, engaging the external rotators.
      • Hold the tension for 10-15 seconds, then relax and repeat.

Build your Glutes! Show off that bum…

It is vital for individuals to have strong glutes and incorporate strengthening exercises into training programmes. Strong glute muscles ensure the correct pelvic alignment and can help reduce lower back pain. Also reducing injuries sustained to the hip, knee and ankle joints. Strong glutes aid in balance, improved posture, single leg limb support and reduced back pain when lifting heavy weights.

Anatomy

The gluteal region is an anatomical area located posteriorly to the pelvic bone at the proximal end of the femur. The muscles in this region move the lower limb at the hip joint. The main glute muscles are glute maximus, medius and minus.

Glute Maximus – This muscle is the biggest out of all the glutes. It is the most superficial and makes up most of the shape of the glutes on the body. This muscle helps perform extension and lateral rotation of the hip.

Glute Medius – This muscle lies between the maximus and the minus. Movements such as abduction and medial rotation occur here.

Glute Minus – The minus is the smallest and deepest of the superficial glute muscles. This also helps movements such as abduction and medial rotation. When in movement this muscle helps secure the pelvis, preventing any pelvic drop.

Importance of Glute Strengthening

1. Strong Glutes help prevent injuries – It is so important to have strong glute muscles and muscles surrounding the hip as this will add support to the lower back, knees and ankles. This is due to the alignment of the body being in the correct positioning and reducing the amount of stress on certain joints in the body.

2. Enhanced Athletic performance – Basic movements such as jumping, running, driving and twisting are all performed through the hips and legs. This aids an athlete performance by increasing their agility levels and strength when carrying out the movements.

3. Improved posture and balance – Having strong Glute muscles will improve your posture and balance within the body. When the hip, glutes and core are stable it will reduce the amount dysfunctional movements in the body. When the hips are aligned, it will keep the neck shoulders and back in a further stable position, improving posture.

Glute Activation & Exercises

Firstly, to activate the glutes you need to stretch. The main area that needs to be stretched is the hip flexors. Stretches such as a kneeling lunges and banded split squats could be really helpful to loosen up the area.

A few glute bridges can be performed to start the activation of the glutes, these exercises will get the glutes warmed up, ready then for people to move onto the heavier weights. This is so important because you do not want to go in straight away with the heavy weights, as this could cause injury and strain to the glute muscles.

Here is a list of exercises that could be used for glute activation:

Exercises

  • 1. Donkey Kicks

    • Purpose: Target the gluteus maximus, helping to build strength and size in the largest muscle of the glutes.
    • How to Perform:
      • Start on all fours with your hands under your shoulders and knees under your hips.
      • Keeping your knee bent at 90 degrees, lift one leg toward the ceiling, engaging your glutes to push your foot upward.
      • Lower the leg back to the starting position without touching the floor, and repeat before switching sides.

    2. Fire Hydrants

    • Purpose: Focus on the gluteus medius and minimus, helping to build the upper and side parts of the glutes for a more rounded appearance.
    • How to Perform:
      • Begin on all fours, similar to donkey kicks.
      • Keeping your knee bent, lift one leg out to the side, aiming to get it parallel to the floor while keeping your hips stable.
      • Lower back down and repeat before switching to the other side.

    3. Lateral Walks

    • Purpose: Strengthen the gluteus medius and minimus, which are crucial for hip stability and creates a more balanced, rounded glute shape.
    • How to Perform:
      • Place a resistance band around your thighs, just above the knees, or around your ankles for more difficulty.
      • Stand with feet hip-width apart, slightly bent knees, and a slight forward lean.
      • Step sideways, keeping tension on the band, and bring the other foot in without fully touching them together.
      • Take a few steps in one direction, then reverse.

    4. Glute Bridge with Abduction

    • Purpose: Combines the standard glute bridge with abduction to target the entire gluteal muscle group, enhancing growth and strength.
    • How to Perform:
      • Lie on your back with knees bent and feet flat on the floor, hip-width apart.
      • Place a resistance band around your thighs, just above the knees.
      • Lift your hips into a bridge position, and at the top, push your knees outward against the resistance band (abduction).
      • Bring your knees back together, lower your hips, and repeat.

    5. Clams

    • Purpose: Specifically target the gluteus medius and minimus, which helps to build side glute muscles and improves hip stability.
    • How to Perform:
      • Lie on your side with your legs stacked and knees bent at 90 degrees.
      • Keep your feet together as you lift the top knee, opening your legs like a clam shell, while keeping your hips stable.
      • Lower the knee back down and repeat before switching sides.

    6. Plank Jacks with Resistance Band

    • Purpose: Engage the glutes dynamically, along with the core, by combining the traditional plank with lateral leg movements against resistance.
    • How to Perform:
      • Start in a plank position with your hands under your shoulders and a resistance band around your ankles.
      • While holding the plank, jump your feet out to the sides, keeping tension in the band, and then jump them back together.
      • Maintain a strong core and keep your hips level throughout the movement.

The glutes play a vital role in a huge majority of bodily moves, helps with core strength and is one of the most active muscles in the body. If you think you need help with your butt, then contact one of our fitness advisors or personal trainers today.