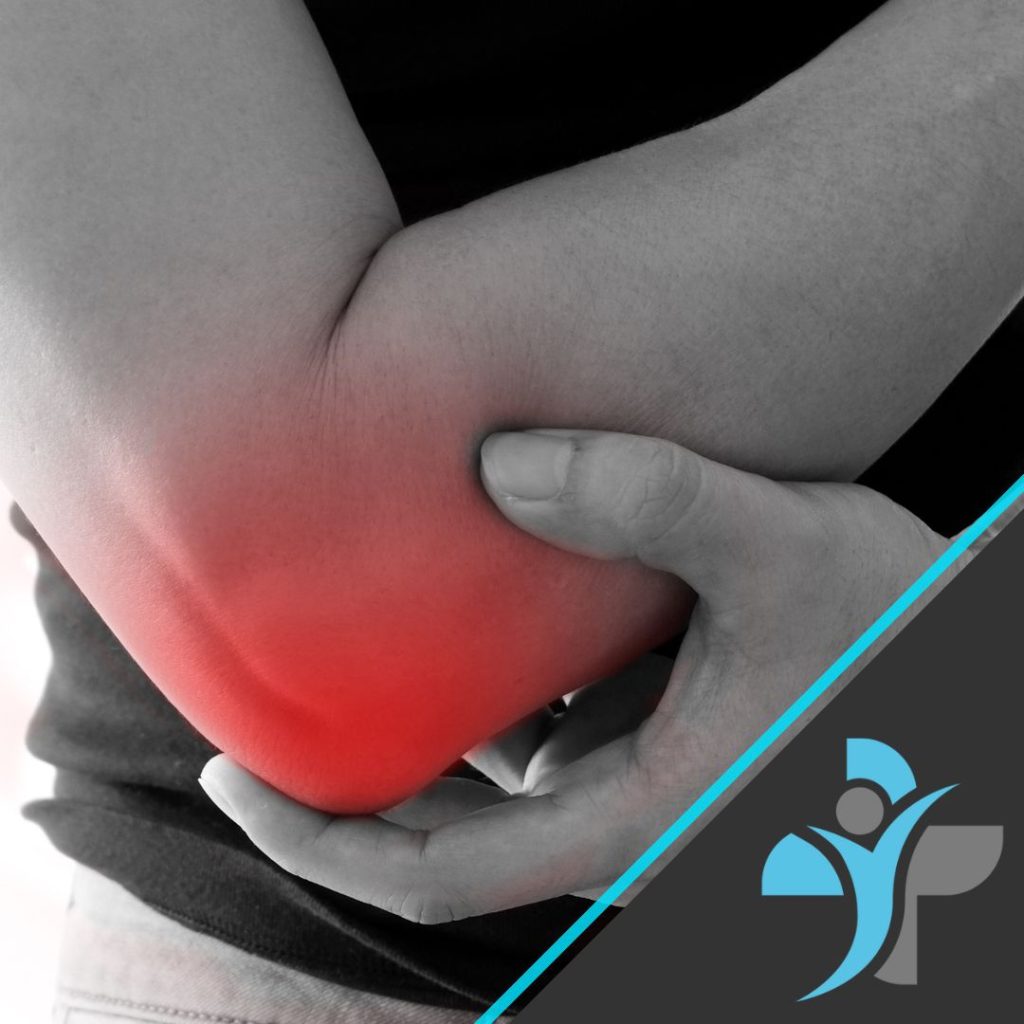
Can Meniscus Tears Heal Without Surgery

The meniscus is a crucial structure within the knee joint, consisting of two C-shaped pieces of cartilage located between the femur and tibia bones. Acting as shock absorbers, the menisci play a vital role in distributing weight, reducing friction, and stabilizing the knee during movement. These rubbery, wedge-shaped tissues are prone to injury, with tears being one of the most common knee injuries, particularly among athletes and older adults. A meniscus tear can occur due to sudden twisting or rotation of the knee, or as a result of degenerative changes over time.

Can Meniscus Tears Heal Without Surgery?

Whether a meniscus tear requires surgical intervention depends on various factors, including the severity, location, and type of tear, as well as the individual’s age, activity level, and overall health. In many cases, small tears located in the outer edge of the meniscus, where blood supply is more robust, have the potential to heal on their own without surgery. Conservative treatment options such as rest, ice, compression, and elevation (RICE), along with physical therapy exercises focused on strengthening the surrounding muscles and improving range of motion, may be sufficient to rehabilitate a minor meniscus tear. Additionally, corticosteroid injections or platelet-rich plasma (PRP) therapy may be recommended to reduce inflammation and promote healing.

Recovery Timeline for Meniscus Tears Without Surgery:

The healing timeline for a meniscus tear treated without surgery can vary depending on several factors, including the extent of the injury, the individual’s age and overall health, and adherence to the prescribed treatment plan. In general, minor meniscus tears may take approximately four to eight weeks to heal with conservative management, while larger or more complex tears may require a longer recovery period. Physical therapy plays a crucial role in the rehabilitation process, helping to restore strength, flexibility, and stability to the knee joint. It is essential for individuals recovering from a meniscus tear to follow their healthcare provider’s recommendations closely and to avoid activities that place excessive stress on the knee during the healing process. While some meniscus tears may resolve without the need for surgery, others may require surgical repair or partial meniscectomy to alleviate symptoms and restore function to the knee joint.

Rehabilitation of a Meniscus Tear

A meniscus tear can significantly impact knee function and mobility, requiring a structured rehabilitation program to facilitate healing, restore strength and flexibility, and prevent future injuries.

Here’s a comprehensive rehabilitation plan tailored for a meniscus tear, however we would always advise personally seeing a sports therapist or physiotherapist to design a tailored plan:

Phase 1: Immediate Post-Injury (Weeks 1-2)

Goals:

  • Reduce pain and inflammation
  • Protect the injured knee
  • Restore range of motion

Treatment:

  1. Rest: Avoid activities that aggravate symptoms, and use crutches if necessary to offload weight from the affected knee.
  2. Ice: Apply ice packs to the knee for 15-20 minutes, 3-4 times a day, to reduce swelling and pain.
  3. Compression: Use a compression bandage or knee sleeve to control swelling and provide support.
  4. Elevation: Elevate the injured leg above heart level when resting to reduce swelling.
  5. Pain management: Take over-the-counter pain medications as prescribed by a healthcare professional.

Phase 2: Recovery and Mobility (Weeks 3-6)

Goals:

  • Improve knee range of motion
  • Begin gentle strengthening exercises
  • Enhance proprioception and balance

Treatment:

  1. Physical therapy: Start a supervised rehabilitation program focusing on gentle knee mobilization exercises, such as heel slides, passive and active knee flexion, and extension exercises.
  2. Strengthening exercises: Initiate low-impact exercises to strengthen the quadriceps, hamstrings, and calf muscles, including straight leg raises, hamstring curls, and calf raises.
  3. Proprioception training: Perform balance and stability exercises, such as single-leg stance and mini-squats, to improve joint proprioception and reduce the risk of re-injury.
  4. Cardiovascular exercise: Engage in non-weight-bearing activities like swimming, stationary cycling, or aqua jogging to maintain cardiovascular fitness without stressing the injured knee.

Phase 3: Functional Rehabilitation (Weeks 7-12)

Goals:

  • Restore normal knee function and strength
  • Improve flexibility and proprioception
  • Gradually return to sport-specific activities

Treatment:

  1. Progressive strengthening: Advance to more challenging strengthening exercises, including lunges, step-ups, and resistance training using bands or weights.
  2. Flexibility exercises: Incorporate stretching exercises to improve flexibility and mobility in the knee joint and surrounding muscles.
  3. Plyometric training: Introduce controlled jumping and hopping exercises to enhance lower limb power and agility.
  4. Sport-specific drills: Gradually reintroduce sport-specific movements and activities, focusing on proper technique and biomechanics.
  5. Functional testing: Assess readiness to return to sport or high-impact activities through functional tests, such as single-leg hop tests and agility drills.

Phase 4: Return to Activity (Weeks 13 and beyond)

Goals:

  • Full recovery and return to previous activity level
  • Prevent recurrence of injury

Treatment:

  1. Gradual return to sport: Resume full participation in sports or physical activities, starting with low-intensity drills and gradually increasing intensity and duration.
  2. Maintenance program: Continue with a maintenance program of strength, flexibility, and proprioception exercises to prevent future injuries and maintain optimal knee function.
  3. Regular monitoring: Attend follow-up appointments with a physical therapist or healthcare provider for ongoing assessment and monitoring of knee health and function.

In conclusion, understanding the nature of meniscus tears and their potential for healing without surgery is essential for individuals navigating treatment options for knee injuries. While conservative management strategies may be effective for some meniscus tears, others may require surgical intervention to achieve optimal outcomes. Consulting with a healthcare provider to determine the most appropriate course of treatment based on the specific characteristics of the injury is crucial for promoting successful recovery and restoring function to the knee joint.

If you would like help and advice on rehabilitation of a meniscus tear, please contact our team for further information.

Understanding the Meniscus: An Essential Component of Knee Health

Understanding the Meniscus: An Essential Component of Knee Health

The meniscus, often referred to as the “shock absorber” of the knee, is a vital structure that plays a crucial role in maintaining knee stability and function. Composed of two C-shaped pieces of cartilage nestled between the femur and tibia bones, the menisci act as cushions, distributing weight evenly across the knee joint and providing stability during movement.

Anatomy and Function

Located within the knee joint, the menisci are tough, rubbery tissues that help to absorb shock and reduce friction between the femur and tibia bones. They also serve to stabilise the knee, preventing excessive movement and providing support during activities such as walking, running, and jumping.

The menisci have a crescent shape, with the larger medial meniscus on the inner side of the knee and the smaller lateral meniscus on the outer side. Each meniscus is attached to the joint capsule and ligaments of the knee, ensuring proper positioning and function.

Common Injuries

Despite their resilience, the menisci are susceptible to injury, particularly during activities that involve twisting, pivoting, or sudden changes in direction. Meniscus tears are among the most common knee injuries, occurring as a result of traumatic injury or degenerative changes associated with ageing or repetitive stress.

Symptoms of a Meniscus Injury

Meniscus injuries can cause a range of symptoms, including:

  1. Pain, especially along the joint line of the knee
  2. Swelling and stiffness
  3. Difficulty fully straightening or bending the knee
  4. Popping or clicking sensations
  5. Feeling of instability or “giving way” in the knee

Diagnosis and Treatment

Diagnosing a meniscus injury typically involves a thorough physical examination, along with imaging tests such as MRI or X-ray to confirm the diagnosis and assess the extent of the injury. Treatment options for meniscus injuries depend on several factors, including the severity and location of the tear, the individual’s age and activity level, and the presence of any underlying knee conditions.

Conservative treatment measures such as rest, ice, compression, and elevation (RICE), along with non-steroidal anti-inflammatory medications (NSAIDs) and physical therapy, may be recommended for minor meniscus tears or for individuals who are not good candidates for surgery.

Surgical options may be considered for larger or complex tears, particularly those that interfere with knee function or cause persistent symptoms. Surgical procedures for meniscus tears may include arthroscopic repair, partial meniscectomy (removal of the torn portion of the meniscus), or meniscus transplant for irreparable tears.

Conclusion

The meniscus plays a crucial role in knee health and function, serving as a vital component of the joint’s stability and shock absorption mechanism. Understanding the anatomy of the meniscus, common injuries, and treatment options is essential for maintaining knee health and preventing long-term complications associated with meniscus injuries. Prompt diagnosis and appropriate treatment can help individuals recover from meniscus injuries and return to their normal activities with improved function and reduced risk of future injury.


If you feel you are struggling with a meniscus issue, our highly qualified sports therapists and physiotherapists can help design a robust rehabilitation plan. Contact us for more information.

Tennis Elbow

Tennis elbow is a condition that causes pain around the outside of the elbow joint, the clinical name for this condition is known as lateral epicondylitis. It usually occurs after strenuous overuse of the muscles and tendons of the forearm. It is a very common musculoskeletal condition with an estimated 1 in 3 people having Tennis Elbow at any one time. The condition is more common in adults and across the age demographic of 30-50 years of age. Both Men and women are equally affected by this condition. Not surprisingly, and as the name suggests, playing tennis or other racquet sports can and is a big factor in the cause of this condition. However, several other sporting activities and non sporting activities can also put you at risk. Tennis elbow can be because of inflammation or, in some cases, small tears of the tendons that join the forearm muscles to the bone (epicondyle of the humerus) on the outside of the elbow.

Anatomy

Your elbow joint is a joint consisting of 3 bones. The first is in your upper arm and known as the Humerus. The other 2 bones are in your forearm and known as the Radius and Ulna bones. At the bottom of the humerus there are small bony prominences called epicondyles, where muscles within the forearm attach. The bony prominence located on the later side of the elbow (outside) is called the lateral epicondyle.

Muscles, ligaments, and tendons play a huge role in holding the elbow joint in position with strength but also flexibility to move.

Lateral epicondylitis, or tennis elbow, is a condition that affects the muscles and tendons of your forearm however extensive research has shown one particular muscle can play a large part in Tennis Elbow which is the Extensor Carpi Radialis Brevis (ECRB) muscle. The muscles associated with Tennis Elbow are responsible for the extension of your wrist and fingers.

Symptoms

The symptoms of tennis elbow usually develop over a long period of time. In the vast majority of tennis elbow cases the pain can just be minor and more of a side note but can worsen over time. In most cases there is no specific injury associated with the condition, it is usually a repetitive overuse injury but not in all cases.

Common signs and symptoms of tennis elbow include:

  • Pain or burning on the outer part of your elbow
  • Pain when lifting, twisting or bending your arm (with or without objects)
  • Weak grip strength
  • Sometimes, pain at night on the outside of your upper forearm, just below the elbow.
  • You may also find it difficult to fully extend your arm.
  • The symptoms are often worse when the forearm is being used in activities that can be as simple as pouring water into a cup, using a screw driver even shaking hands.

Causes

Overuse – Recent studies have show that a particular muscle, when damaged can play a large part in the cause of Tennis Elbow. This muscle, located in the forearm, is known as the extensor carpi radialis brevis (ECRB). It is a muscle that helps in stabilizing the wrist when the elbow is straight.

When the ECRB is injured / weakened from overuse or a specific incident, small tears appear in the tendon where it attaches to the lateral epicondyle (bony prominence). This of course then leads to inflammation and the resulting pain.

Studies also show, the ECRB could be at a greater risk of damage because of its position. As the elbow bends and straightens, the muscle rubs against bony bumps. This can cause gradual wear and tear of the muscle over time.

Activities – Activities play a large part in the cause of Tennis Elbow (Lateral epicondylitis). As you would expect Tennis and other racket sports are a factor in the case of Tennis Elbow (hence the name) however anyone can get it and it could even be down to work related overuse. Professionals such as Plumbers, Electricians, Carpenters, Factory Workers, Cooks and Butchers can get this condition based on how they are using their arm such as the use of screw drivers with the twisting actions etc

Age – Anyone can get Tennis Elbow at any stage in their life depending on the activities they are doing and how they are using their arm. That said, the majority of cases we see can range between the ages of 30 and 50.

Unknown – Tennis Elbow (Lateral epicondylitis) has been known to occur even without any particular reason such as repetitive over use etc. If this happens, it is called “idiopathic” or in layman’s terms, of an unknown cause.

Pain that occurs on the inner side of the elbow is often known as golfer’s elbow

Diagnosis

When discussing this issue with your doctor, they will take into consideration a number if factors before making a diagnosis. These will include how your symptoms developed, your work and your hobbies etc.

The Doctor will discuss how and when the symptoms occur and are more severe and where on the arm the pain / symptoms are materialising. You will need to make sure you inform your doctor of any underlying health issues such as Arthritis (RA or Osteo), you you have injured your elbow in the past or any other medical issues that has a baring on your elbow.

There are a number of tests the doctors can and should perform during your examination such as asking you to try straighten your wrist and fingers with the doctor providing resistance with your arm straight.

Your doctor may recommend additional tests such as X-rays, Magnetic resonance imaging (MRI) scan or an Electromyography (EMG) – this will be to rule out nerve compression.

Treatment

Tennis elbow is a condition that will eventually get better over time, the length of time will be determined by how much you are using the arm in the way in which it was damaged in the first place. This may mean you will need to stay off certain activities indefinitely for a period of around 6-8 weeks. This could be shorter or longer depending on what state the injury is in.

However, there are treatments that can be used to speed up your recovery and ultimately help alleviate symptoms while you recover.

The first stage in any recover is REST. It is important you rest your injured arm and stop doing the activity that’s caused the problem in the first instance.

ICE – Apply a cold compress to the injured arm, such as a bag of frozen peas or a sports ice pack / gel pack for a few minutes several times a day, this will reduce inflammation and ease the pain. Some people have great success with contrast bathing the area so for example, icing the joint itself (the bony / tendinous areas) and using heat on the muscular areas such as Forearm to relax the muscles and speed up recover.

PAINKILLERS – Taking Paracetamol to ease the pain and Non-Steroidal Anti-Inflammatory’s such as Ibuprofen to reduce the inflammation can help greatly whilst in recovery.

MASSAGE – Asking your personal Sports Therapist / Massage Therapist to perform a sports massage on the arm offering STR (Soft Tissue Release) as well as general massage to relax the area and stimulate blood flow can really help to speed up recovery and make you feel better.

PHYSIOTHERAPY – Physiotherapy should be considered with other conservative treatment options especially for more severe and persistent cases.

A good rehabilitation plan with those elements mentioned above has seen great results and improved recovery time as well as reduced inflammation, reduced pain and improvement to the range of movement in your arm.

SURGERY may be an option if the issue persists and you have gone through a considered and tailored physiotherapy and massage program as a last resort to remove the damaged part of the tendon.

Depending on the severity of your Tennis Elbow, recovery can take anything from a couple of months through to 2 years in the most extreme cases. Getting over such an injury should not be considered quick or with a magic treatment, recovery and repair takes time, getting the rehabilitation right is also a very important thing to consider to stop this reoccurring.

Exercises

There are a number of exercises you can perform to help in the recovery of Tennis Elbow but also to help strengthen the area to help in the preventing moving forward. We have put together a video of some of the popular and most effective exercises / rehabilitation programs for this condition. Alternatively you can consult one of our personal trainers or strength & conditioning coaches.

Prevention

It’s not easy to avoid getting tennis elbow as it can be very minor issues that cause it. However a dynamic and considered training program with a qualified strength and conditioning coach can really help. Further to this if your injury was caused through overuse then looking at reducing that particular activity until you have strengthen the area or looking at other ways to do the task in question will help.

Should you need any further information or help, please contact a member of our team. Alternatively you can book one of our Sports Therapists or Physiotherapists through our online booking system.

Tennis Elbow Main Image for article

Shin Splints

Shin splints is a generic term used to describe several conditions of the lower leg such as:
– Medial tibial stress syndrome (MTSS)
– Stress Fractures
– Compartment Syndrome

Throughout this article will we discuss the signs & symptoms for each condition.

Anatomy

The function of the tibialis anterior muscle is to dorsiflex the foot (bringing your toes towards the shin). Not a lot of strength is required to perform this movement and as a result the TA tends to be quite small. As the muscle contracts to perform dorsiflexion, the plantarflexors relax to allow the foot to raise. Plantarflexors are muscles that create the opposing movement of the foot, meaning they bring your toes down towards the ground. If the plantarflexors fail to relax, then the TA needs to overcome both the weight of the foot and the intrinsic resistance of these antagonistic muscles. This extra effort causes overload on the TA, resulting pain and discomfort.

Medial tibial stress syndrome (MTSS)

MTSS is inflammation of the periosteum, usually occurring on the posterior and medial surfaces of the tibia. The inflammation results in scar tissue which can stick or ‘splint’ the affected muscles (gastrocnemius and soleus) to the bone, making it difficult for them to lengthen, which would allow the tibialis anterior (TA) muscle to function.

Symptoms

– Pain and discomfort in the front and medial side of the shin, especially when walking or running uphill since the ROM required increases.
– inflammation along tibia
– persistent discomfort during activity, increases with walking or uphill running
– limited dorsiflexion (tight calf musculature)
– pain on palpation of medial tibial border
– pain on full contraction or stretch
– foot in a pronated position

Causes

– Muscle imbalance
– Impact
– Change of stress (e.g: shoes, surfaces, intensity)
– Over pronation of the foot

Stress Fractures

Continued microtrauma caused by repetitive impact can lead to small cracks developing in the tibia. The fractures often occur on the anterior tibia where the impact force is focussed.

Symptoms

– Pain felt on anterior and posterior tibia
– Increased pain with activity (particularly impact)
– Pain on palpation on anterior tibia
– Nodules along anterior tibia may be felt in more chronic stages

Causes

– Muscle imbalance
– Poor posture
– Over pronation during walking, jogging or running gait
– Overuse and excessive repetition
– Too much too soon

Compartment Syndrome

Compartment syndrome results in an increase in pressure in any of the four compartments of the lower leg

Symptoms

Symptoms are similar to those of deep vein thrombosis (DVT), so the healthcare professional should be confident that DVT is not a possibility before progressing with any treatment.

– Pain and swelling of lower limb
– Pain and discomfort increasing with activity
– Symptoms relieved shortly after activity stops
– Pain on palpation of affected compartment
– Pain on contraction of affected muscles
– Reduced ROM relating to movements of the muscles in the affected compartment
– Neurological symptoms distal to the compartment (numbness, tingling)
– Reduced pulse quality of the affected foot

Causes

– Post-impact bleeding
– Rapid hypertrophy of compartment muscles
– Inflammation of tendons from repetitive movement or impact
– Reduced flexibility in an adjacent compartment

Diagnosis of Shin Splints

Shin splints are usually diagnosed from the patients’ medical history and a physical exam. In some cases, an X-ray or other imaging studies can help identify stress fractures.

Treatment

Rest – Avoid activities that cause pain or discomfort but don’t give up all physical activity. While you’re healing, perform low-impact exercises, such as swimming, bicycling or water running.

Ice – Apply ice packs to the affected shin for 15 to 20 minutes at a time, every 2-3 hours for several days. To protect your skin, wrap the ice packs in a thin towel.

Take an over-the-counter pain reliever. Try ibuprofen to reduce pain.

Resume usual activities gradually after your pain is gone.

Alternative therapies

As soft tissue specialists in some cases Shin Splints can be confused with a tightness in the Tibialis Anterior muscle and as such a sports massage or deep tissue massage can relieve the issue. That said even if you have shine splints, maintaining good blood flow to the area and keeping your muscles relaxed and the lymphatic fluid drained can also be achieved through hands on soft tissue massage and lymphatic drainage techniques. Other therapies like medical acupuncture has also shown to be effective in the management of pain and symptoms.

Exercises

Standing Gastrocnemius Stretch

Primary muscles stretched: Gastrocnemius (calf muscle)

  1. Starting Position: Stand facing a wall or sturdy object, about arm’s length away. Place your hands flat against the wall at shoulder height for support. Keep your feet hip-width apart and both feet flat on the ground.
  2. Step Back: Take a step back with one foot, keeping it flat on the ground and extending it behind you. Your back leg should be straight, with your heel firmly planted on the ground and your toes pointing directly forward.
  3. Bend Front Knee: Bend your front knee, shifting your weight slightly forward while keeping your back leg straight. You should feel a gentle stretch in the calf muscle of your back leg.
  4. Adjust Position: If you don’t feel a stretch, you can adjust your stance by stepping farther back or bending your front knee slightly more. Ensure that your back heel remains in contact with the ground throughout the stretch.
  5. Hold and Breathe: Hold the stretch for 20-30 seconds, focusing on deep, steady breaths. Relax into the stretch, allowing the tension in your calf muscle to gradually release.
  6. Switch Sides: After holding the stretch on one side, release and switch legs, stepping back with the opposite foot. Repeat the stretch on the other side, following the same steps.
  7. Repeat: Perform the stretch 2-3 times on each leg, aiming to deepen the stretch slightly with each repetition. Listen to your body and avoid pushing into pain or discomfort.

Soleus Stretch

Primary muscles stretched: Soleus (calf muscle)

  1. Starting Position: Sit on the floor with your legs extended in front of you. Keep your back straight and your feet flexed, pointing towards the ceiling.
  2. Bend Knee: Bend one knee and cross it over the opposite leg, placing your foot flat on the floor on the outside of your opposite knee. Your bent knee should be pointing towards the ceiling.
  3. Foot Positioning: Keep your foot on the floor relaxed, with your toes pointing slightly outward and the sole of your foot in contact with the ground.
  4. Lean Back: Slowly lean back, using your hands for support behind you. Keep your back straight and your chest lifted as you lower your upper body towards the floor.
  5. Feel the Stretch: You should feel a gentle stretch in the calf muscle of your extended leg. This stretch primarily targets the soleus muscle, located deeper within the calf.
  6. Hold and Breathe: Hold the stretch for 20-30 seconds, focusing on deep, steady breaths. Relax into the stretch, allowing the tension in your calf muscle to gradually release.
  7. Switch Sides: Release the stretch and switch legs, crossing the opposite knee over the other leg and repeating the stretch on the opposite side.
  8. Repeat: Perform the stretch 2-3 times on each leg, aiming to deepen the stretch slightly with each repetition. Listen to your body and avoid pushing into pain or discomfort.

Tibialis Anterior Stretch

Primary muscles stretched: Tibialis anterior (front of shin)

  1. Starting Position: Sit on the floor with your legs extended in front of you. Keep your back straight and your feet flexed, pointing towards the ceiling.
  2. Cross Ankle: Cross one ankle over the opposite knee, placing your foot flat on the floor beside your opposite knee. Your crossed leg should form a figure-four shape.
  3. Lean Back: Slowly lean back, using your hands for support behind you. Keep your back straight and your chest lifted as you lower your upper body towards the floor.
  4. Point Toes: Point your toes of the crossed leg towards the ceiling. This movement will target the tibialis anterior muscle, located on the front of your shin.
  5. Feel the Stretch: You should feel a gentle stretch along the front of your shin and ankle of the crossed leg.
  6. Hold and Breathe: Hold the stretch for 20-30 seconds, focusing on deep, steady breaths. Relax into the stretch, allowing the tension in your tibialis anterior muscle to gradually release.
  7. Switch Sides: Release the stretch and switch legs, crossing the opposite ankle over the other knee and repeating the stretch on the opposite side.
  8. Repeat: Perform the stretch 2-3 times on each leg, aiming to deepen the stretch slightly with each repetition. Listen to your body and avoid pushing into pain or discomfort.

Calf Raises

Muscles targeted: Gastrocnemius (calf muscle), Soleus

  1. Starting Position: Stand tall with your feet hip-width apart, ensuring your weight is evenly distributed between both feet. Keep your shoulders relaxed and your abdominal muscles engaged for stability.
  2. Lift: Slowly rise up onto the balls of your feet by lifting your heels off the ground. Focus on using your calf muscles to initiate the movement. Keep your core tight to maintain balance.
  3. Peak Contraction: Once you’ve reached the highest point of the movement where you feel a strong contraction in your calf muscles, pause briefly. Ensure that you maintain control throughout the exercise to prevent any jerky movements.
  4. Lowering Phase: Slowly lower your heels back down to the starting position, allowing your heels to gently touch the ground. Resist the urge to drop your heels quickly, as this reduces the effectiveness of the exercise.
  5. Repeat: Perform the desired number of repetitions, aiming for 10-15 repetitions to start with. As you become more comfortable with the exercise, you can gradually increase the number of repetitions or add additional resistance by holding onto dumbbells or using a calf raise machine.

Resisted Dorsiflexion

Muscles targeted: Tibialis anterior

  1. Starting Position: Sit on a chair or bench with your feet flat on the floor, hip-width apart. Place a resistance band around the top of your foot, securing the other end to a stable object in front of you, such as a table leg or heavy piece of furniture.
  2. Ankle Positioning: Sit up straight with your shoulders relaxed and your abdominal muscles engaged. Your knees should be bent at a 90-degree angle, with your thighs parallel to the ground. Ensure that the resistance band is positioned securely around the top of your foot, just below your toes.
  3. Dorsiflexion: Keeping your heel planted firmly on the ground, slowly pull your toes towards your shins against the resistance of the band. Focus on contracting the muscles on the front of your shin (tibialis anterior) to lift your foot upwards, bringing your toes closer to your body.
  4. Peak Contraction: Hold the top position for a moment, feeling the muscles on the front of your shin working hard. Maintain control throughout the movement to maximize muscle engagement and prevent any jerky motions.
  5. Lowering Phase: Slowly release the tension on the resistance band as you lower your foot back down to the starting position, allowing your toes to point away from your body. Avoid letting the resistance band snap back quickly, as this can strain your ankle joint.
  6. Repeat: Perform the desired number of repetitions, aiming for 10-15 repetitions to start with. As you become more familiar with the exercise and your strength improves, you can gradually increase the number of repetitions or adjust the resistance level of the band.

If you believe you have shin splints and would like to have an evaluation done and possibly some treatment by some of our physiotherapists or sports therapists, then please contact us or alternatively make a booking online.

Iliotibial Band Syndrome (ITB Syndrome)

Iliotibial Band (ITB) syndrome is a condition that often causes pain in the outside of the knee. The ITB itself is a thick connective tissue that originates at the hip and inserts into the knee; it is composed of the tendinous portions of the Tensor Fascia Latae and Gluteal muscles. The ITB’s purpose is to stabilise the knee joint and assist with movement

Anatomy

The ITB is a large thick band of fasia, that originates at the anterolateral iliac tubercle of the exernal lip of the iliac crest & inserts into the lateral condyle of the tibia at the Gerdy’s tubercle. Meaning it begins at the top part of your pelvis, runs down the lateral side of the thigh & attaches at the top of the shinbone, just under the knee cap. It is composed from the Tensor Fascia Lata & Gluteal muscles, then becomes proportionately thickened before attaching into the knee. This thick fibrous sheath then helps to stabilize the lateral side of the knee during flexion & extension, as well as aiding with hip abduction. When the knee is in a flexed position, the ITB is behind the lateral epicondyle, as you start to straighten the leg the ITB then travels forward across the epicondyle.

Causes

ITB syndrome is an overuse injury that usually presents as pain in the lateral aspect of the knee due to inflammation of a portion of the band, most commonly near the knee. It is most common in runners due to the repetitive knee flexion and extension (bending and straightening) of the knee required.

When the knee repetitively bends and straightens, the band slides of the lateral femoral condyle of the knee, causing excessive friction and thus inflaming the band, resulting in pain. It has been found that individuals diagnosed with ITB syndrome often have thickening of the band itself, which inflames the space between the ITB and femoral condyle.

A number of training factors have been suggested to be risk factors for ITB syndrome:

  • Excessive running in the same direction on a track
  • Increased running mileage
  • Downhill running
  • Wearing worn out shoes with improper support

Symptoms

If you are suffering from ITB Syndrome you may notice;

  • Sharp pain, particularly on the outside of the knee
  • Pain when the knee is bent to approximately 30 degrees
  • Tightness and reduced flexibility
  • Tenderness on the outside of the knee
  • Pain when running or cycling.

If you suffer with any of these symptoms and suspect you may have ITB syndrome, contact your GP or local Sports Therapist/ Physiotherapist who can complete a thorough assessment to determine a clear diagnosis.

Diagnosis

If you suspect you have ITB syndrome, it’s crucial to seek professional assessment from a qualified healthcare provider, such as a physiotherapist or sports medicine doctor. They will conduct a comprehensive evaluation, which may include:

  • Medical History: This involves discussing your symptoms, their onset, and any activities that exacerbate or alleviate the pain. Your doctor will also inquire about your training habits, previous injuries, and overall health status.
  • Physical Examination: The doctor will examine your knee, assessing for tenderness, swelling, and range of motion. They may also perform specific tests, such as the Noble Compression Test or Ober’s Test, to further evaluate the ITB.
  • Imaging Studies: In some cases, imaging studies like ultrasound or MRI may be recommended to rule out other potential causes of knee pain or to assess the severity of the ITB inflammation.

Differential Diagnosis

It’s important to note that other conditions can mimic the symptoms of ITB syndrome, such as:

  • Lateral meniscus tear: This involves damage to the cartilage cushion on the outer side of the knee, causing pain, swelling, and locking sensations.
  • Biceps femoris tendinopathy: This condition involves inflammation or irritation of the hamstring tendons, leading to pain in the back of the thigh or knee.
  • Patellofemoral pain syndrome: Also known as runner’s knee, this condition causes pain around the kneecap due to overuse or misalignment.

A thorough evaluation by a healthcare professional is essential to rule out these other conditions and confirm the diagnosis of ITB syndrome.

Treatment

Physical therapy (Physiotherapy) plays a crucial role in ITB syndrome treatment. A qualified therapist will develop a personalised plan that may include:

  • Stretching Exercises: Specific stretches targeting the ITB, hip muscles, and gluteal muscles can help improve flexibility and reduce tension.
  • Strengthening Exercises: Strengthening the hip abductors, gluteal muscles, and core can improve stability and reduce stress on the ITB.
  • Manual Therapy: Techniques such as sports massage, medical acupuncture, myofascial release, and trigger point therapy can help alleviate pain and improve tissue mobility.

Pain Management

Over-the-counter pain relievers like ibuprofen or naproxen can help reduce pain and inflammation. In some cases, your doctor may prescribe stronger pain medications or corticosteroid injections for short-term relief.

Addressing Underlying Causes

ITB syndrome often stems from biomechanical imbalances or training errors. A thorough assessment by a healthcare professional can identify underlying issues, such as:

  • Muscle weakness or tightness: Imbalances in muscle strength or flexibility can contribute to ITB syndrome. A qualified personal trainer or sports therapist can address these issues through targeted exercises.
  • Training errors: Overtraining, sudden increases in mileage or intensity, or running on uneven surfaces can all contribute to ITB syndrome. Adjusting your training plan and incorporating proper warm-up and cool-down routines can help prevent future flare-ups.
  • Footwear or orthotics: Improper footwear or underlying biomechanical issues may require orthotics or shoe modifications to correct foot mechanics and reduce stress on the ITB.

Exercises

ITB Syndrome Stretches:

  1. IT Band Stretch (Standing):

    • Stand with your feet shoulder-width apart.
    • Cross the affected leg behind the other leg.
    • Lean your torso away from the affected side until you feel a stretch along the outer thigh.
    • Hold for 30 seconds, then repeat on the other side.
  2. IT Band Stretch (Lying):

    • Lie on your side with the affected leg on top.
    • Bend the top knee and reach back with your hand to grasp your foot or ankle.
    • Gently pull your heel towards your buttock until you feel a stretch in the front of your hip and thigh.
    • Hold for 30 seconds, then repeat on the other side.
  3. Hip Flexor Stretch:

    • Kneel on one knee with the other foot flat on the floor in front of you.
    • Lean forward, keeping your back straight, until you feel a stretch in the front of the hip of the kneeling leg.
    • Hold for 30 seconds, then repeat on the other side.
  4. Glute Stretch (Pigeon Pose):

    • Start in a push-up position.
    • Bring one knee forward and place it on the floor just behind your wrist, with your foot angled outwards.
    • Extend the other leg straight behind you.
    • Lean forward over the front leg until you feel a stretch in the outer hip and buttock of the front leg.
    • Hold for 30 seconds, then repeat on the other side.

ITB Syndrome Exercises:

  1. Clamshells:

    • Lie on your side with knees bent and feet stacked.
    • Keeping your feet together, lift your top knee open like a clamshell.
    • Slowly lower back down.
    • Repeat for 10-15 repetitions on each side.
  2. Side-Lying Leg Raises:

    • Lie on your side with legs extended.
    • Lift your top leg up towards the ceiling, keeping your hips stacked and core engaged.
    • Slowly lower back down.
    • Repeat for 10-15 repetitions on each side.
  3. Foam Rolling:

    • Place a foam roller under the outer thigh of the affected leg.
    • Slowly roll back and forth over the IT band from hip to knee.
    • Hold on tender spots for 30 seconds.
  4. Single Leg Squats:

    • Stand on one leg with your knee slightly bent.
    • Slowly lower yourself down as far as comfortable, keeping your knee aligned with your toes.
    • Push back up to the starting position.
    • Repeat for 10-15 repetitions on each leg.

Important Considerations:

  • Consult a healthcare professional before starting any new exercise or stretching routine, especially if you have any underlying medical conditions.
  • Perform stretches and exercises gently and gradually increase the intensity and duration as tolerated.
  • Listen to your body and stop any activity that causes pain.

Remember, consistency is key! Regular stretching and strengthening exercises can help prevent ITB syndrome from recurring and keep you moving pain-free.

Please see some exercise examples in our video.

Coming Soon..


If you feel like you are experiencing issues with your IT Band and would like to speak to one of our professional physiotherapists or sports therapists then our team can help. We have specialists covering a number of locations in the UK such as Birmingham, Manchester, Liverpool, Gloucester, Leeds, Wolverhampton, Derby, Nottingham, Leicester, Colchester, Maidstone and London. For more information you can contact us via our contact page.

Gluteus Muscle Stretches

Benefits of glutes stretching

• Relieve Pain: Stretching tight glutes can help relieve low back pain, buttocks pain, pelvic pain, tight hips, tight hamstrings, and in some cases, knee pain.
• Improve Flexibility: Regular glute stretching can help increase flexibility in your muscles, allowing you to move more freely.
• Enhance Range of Motion: By stretching your glutes, you can improve your range of motion, making it easier to perform daily activities with ease.
• Reduce Injury Risk: Tight glutes can lead to poor posture and gait, putting you at a higher risk of injury. Regular stretching can help reduce the risk of injury by maintaining muscle balance and flexibility.
• Improve Mobility: Regular glute stretching can help improve overall mobility and performance by reducing tension and promoting relaxation in your muscles.

Exercises

Step 1: Start in a seated position with both legs extended straight in front of you.
Step 2: Bend your right knee and bring the right ankle over your left knee so that your right shin is perpendicular to the floor.
Step 3: Bend your left knee and use your left hand to grasp your left ankle or shin.
Step 4: Hold for 30 seconds to 1 minute, then release and repeat on the other side.

Half Pigeon Variation

Step 1: Start on your hands and knees with your hands directly below your shoulders and your knees directly below your hips.
Step 2: Bring your right knee forward to the outside of your right hand and extend your right leg behind you so that your ankle is in line with your left hip.
Step 3: Place your right hand on the floor in front of you and slowly begin to lower your body down, resting your right forearm on the floor.
Step 4: Hold for 30 seconds to 1 minute, then release and repeat on the other side.

Half Lord of the Fishes

Step 1: Start in a seated position with both legs extended straight in front of you.
Step 2: Bend your right knee and bring your foot to the outside of your left hip.
Step 3: Twist your torso to the right and place your right hand behind you for support.
Step 4: Place your left elbow on the outside of your right knee and hold onto your right foot with your left hand.
Step 5: Hold for 30 seconds to 1 minute, then release and repeat on the other side.

90-90

Step 1: Start in a seated position with your legs straight out in front of you.
Step 2: Flex your right foot and bend your right knee, bringing it towards your chest. Place your arms around your shin to support the stretch.
Bonus: To deepen the stretch, gently pull your right knee towards your right armpit while maintaining a straight back. Hold this position for 1-2 minutes, then repeat on the other side. This is one repetition.

Recline Knee To Chest

Step 1: Lie on your back, legs extended.
Step 2: Flex left knee, grab shin & pull it to chest.
Step 3 (Optional): To deepen, pull left knee towards left armpit, keeping low back on mat. Hold 1-2 min. Repeat on right side.

Downward-Facing Dog

Step 1: Begin in a push-up position, with your hands placed shoulder-width apart and legs together.
Step 2: Straighten your body and engage your core muscles.
Step 3: Move your hips back and up, forming an inverted “V” shape with your body.
Step 4: Slight bend your knees and bring your head between your shoulders, aligning it with your spine.
Step 5: Reach your heels towards the floor, keeping them slightly raised.
Step 6: Hold the pose for 20 seconds and then return to the starting position.
To provide extra wrist support, you can place each hand on a yoga block.
If needed, bend your knees to help straighten your back, making sure your body stays in an inverted “V” shape.

Foam Rolling

Step 1: Sit on foam roller, hands on floor behind
Step 2: Turn out right ankle to rest on left knee, tilt hips to right.
Step 3: Roll along length of right glute, focusing on tight spots
Repeat on left side.

When performing any of these exercises it is advised you consult a personal trainer or strength and conditioning coach, or part of your local gym fitness team, to make sure your form is correct. If done incorrectly, injuries may occur. If you have any more questions about whether there is anything else you can do to support your muscle growth, you can get in contact with one of our exercise professionals through our email info@livewellhealth.co.uk or give s a call on 0330 043 2501. Alternatively visit our contact page and fill in the contact form.

General Muscle Strains

Muscle strains, also known as pulled muscle, usually arise from an indirect insult from application of excessive tensile forces. Most muscle strain injuries occur from a powerful eccentric contraction or overstretching of the muscle, while more severe injuries may involve partial or complete tears in tissues. Muscle strains are one of the most common injuries, particularly in sport where 90% of all sports-related skeletal muscle injuries account as muscle strains. For most with grade I muscle strains, healing takes about 2-4 weeks, and typically 2 months for those with a grade II strain. In rare and severe instances, grade III strains could take at least 6 months, or longer, depending on the type of surgery received. Muscle strains are predisposed by older age, previous muscle injury, less flexibility, lack of strength, and fatigue. Minor muscle strains typically heal on their own with rest, however therapeutic massages could speed a strained muscle injury, by helping to loosen the tight muscle and increase blood flow to help heal damaged tissues.

Anatomy

These kind of injuries mostly occurs at the musculotendinous junction (primary site of force transmission between the two tissues), where the tendon emerges from the muscle belly and myo-tendinous junction. During eccentric muscle actions, or when muscle tension increases suddenly, the damage may occur in the area beneath the epimysium and the site of muscle attachment to the periosteum. The region adjacent to the MTJ is more susceptible to injury than any other component of the muscle unit, respectively, from type and direction of applied forces and muscle architecture. Haemorrhage occurs in the affected area, up to 24 hours after injury, with an inflammatory reaction occurring after. Laying down of fibrous tissue and scar tissue starts after 7 days, being visible after 2 weeks.

Symptoms of the pathology

• Pain, tenderness, redness, or bruising
• Limited range of motion
• Muscle spasms
• Swelling
• Localised pain and general muscle weakness
The inflammatory phase- occurs within a few hours however peaks 1 to 3 days after the injury. Redness, swelling, heat, pain, decreased range of motion.
The Proliferation phase- 24 to 48 hours after the injury. If a muscle is partially torn, this phase will repair the tear by laying down new fibres to repair that gap (scar tissue).
The Remodelling Phase- up to 1-2 years. Formation of the muscle where re-injury is more susceptible.

Causes

Muscle strains usually occur from an indirect insult, from application of excessive tensile forces. The most commonly injured muscles are the bicep femoris, rectus femoris, and the medial head of the gastrocnemius, all with a greater percentage of type II fibres, a pennate architecture, cross two joints. Strains typically occur during the eccentric phase of a muscle action or during excessive loading, where the muscle can become overstretched beyond its limit. Laboratory studies show that partial and complete injuries exhibit disruption of muscle fibres near the muscle-tendon junction, where tissues tear when forces across the musculotendinous unit contract too strongly.
Risk factors: Muscle imbalances, poor conditioning (e.g., weaker muscles), fatigue in the muscles.

Diagnosis

Manual Testing – observation, palpation, strength testing, and evaluation of motion.
Most muscle strains can be diagnosed through manual testing, where pain is typically felt by the patient with resisted muscle activation, passive stretching, and direct palpation over the muscle strain. Assessing tenderness, any palpable defect, and strength at the onset of muscle injury will determine grading of the injury and provide direction for further diagnostic testing and treatment.
Often, diagnosis is uncertain and further detail is needed to locate the muscle strain. Radiographs, ultrasound (US), and magnetic resonance imagine (MRI) are common imaging tools. Radiographs would return normal in acute muscle strains, however, may be useful in differentiating between bony and muscular aetiologies of pain.

Clinical grading system

Grade I- localised pain worsening with movement, mild swelling, tenderness, and minimal haemorrhage. (< 10° RoM deficit) Grade II- localised pain worsening with movement, substantial pain to palpation, considerable pain on contraction with greatly disturbed gait. (10-25° RoM deficit) Grade III- (muscle or tendon rupture) severe pain, swelling, and haematoma present. Palpable defect and loss of muscle function. (> 25° RoM deficit).

Treatment

Treatment for muscle strain injuries has remained the same over the years, with little scientific basis for most treatment protocols. Instead, it provides a basis for the currently accepted methods of treatment.
Initial treatment consists of rest, ice, compression, and nonsteroidal anti-inflammatory drug therapy. As pain and swelling subside, physical therapy should be initiated to restore flexibility and strength. Strengthening, range of motion, proprioceptive exercises, and functional training are subsequently followed, that should progress gradually. Stretching exercises should be done carefully without pain, and only to the point of discomfort. Strengthening exercises should progress sequentially through isometric, isotonic, isokinetic, and functional exercises, through a pain free range of motion. Massage therapy may also help to relax injured muscles and improve range of motion, and immobilisation therapy can be used to remain the injured area in a neutral position.

Exercises

The type and intensity of exercises will depend on the injured area and should be performed through a pain-free range of motion and only to a point of discomfort.
For the most common muscle strain injuries, examples include:
Hamstrings (add resistance in absence of pain):
– Hamstring curl– Lie on stomach, lift foot of affected leg by bending the knee
– Hip extension– Face a wall with hands at about chest level. Kick the affected leg behind you, remaining in control
Quadriceps (can add ankle weight to increase difficulty)
– Straight leg raise (laterally rotated)– raise leg parallel to the bent leg without arching the back.
– Wall squat– slowly lower body down and hold, maintaining pelvis, back, and head against the wall.
Gastrocnemius
– Plantar flexion with resistance– point the foot away while sitting down, holding a loop of resistance band to apply resistance
– Calf raises– seated in the early stages or standing in later stages. Raise up onto toes and lower the heels back down.

If you are suffering from any of the things listed above, you can contact us through an email info@livewellhealth.co.uk or give us a call on 0330 043 2501.

Hip flexor strengthening exercises

Hip Flexor Strengthening exercises

Stretching

Quadricep and hip flexor stretch (lying on side):

• Lie on one side, with your legs extended and stacked on top of each other
• Bend your top knee and bring your foot towards your glutes, keeping your bottom leg straight
• Hold this stretch for about 30 seconds and then switch sides

Hip flexors stretch (kneeling):

• Kneel on the floor with one foot in front of the other
• Shift your weight forward, keeping your back straight, until you feel a stretch in your hip flexors
• Hold this stretch for about 30 seconds and then switch sides

Hip flexors stretch (edge of table):

• Stand facing a table or similar surface
• Place one foot up on the table with your knee bent, while keeping the other foot on the floor
• Lean forward into the table until you feel a stretch in your hip flexors
• Hold this stretch for about 30 seconds and then switch sides

Seated butterfly:

• Sit on the floor with the soles of your feet touching each other
• Hold onto your feet and gently press your knees down towards the floor
• Hold this stretch for about 30 seconds

Bridge pose:

• Lie on your back with your knees bent and feet flat on the floor
• Lift your hips up towards the ceiling, keeping your feet and shoulders on the ground
• Hold this position for a few seconds and then slowly lower your hips back down to the floor.

Strengthening

Mountain climbers:

• Get into a push-up position with your hands placed under your shoulders
• Bring one knee up towards your chest while keeping your other leg extended behind you
• Switch legs quickly and repeat the motion, as if you are running in place
• Continue this motion for a specified number of repetitions or for a set amount of time

Lunges/Jump Lunges:

• Stand with your feet hip-width apart
• Step forward with one foot, lowering your body until both knees form a 90-degree angle
• Push back up to the starting position
• For jump lunges, add a jump as you switch legs and land with the opposite foot forward.

Straight leg raises:

• Lie on your back with your legs extended straight up towards the ceiling
• Keeping your legs straight, lower one leg down towards the floor until it is about 6 inches off the ground
• Raise your leg back up to the starting position and repeat with the other leg
• Continue this motion for a specified number of repetitions or for a set amount of time.

Hamstring bridge with banded hip flexion:

• Lie on your back with your knees bent and feet flat on the floor
• Place a resistance band around your thighs, just above your knees
• Push through your heels to lift your hips up towards the ceiling
• While holding this position, bring your knees towards your chest and then straighten them back out

Standing knee flexion with additional weight:

• Attach weight to one feet
• Focusing on holding your core strong, bend the knee to flexed position
• Continue this motion for a specified number of repetitions or for a set amount of time.

Flat Feet

Flat Foot, medically known as Pes planus, is a condition in which the medial longitudinal arch (MLA) which runs the length of the foot is flattened out or lowered. Flatfoot may affect one or both feet, and it can not only increase the load acting on the foot structure, but also interferes with the normal foot function. Therefore, individuals with flat feet experience discomfort while standing for long periods of time and exhibit a distinctive flat-footed gait. Typical flatfoot symptoms include a tenderness of the plantar fascia, a laxity of the ligaments, a rapid tiring of the foot, pain under stress, and instability of the medial side foot structure. Over time, the mechanical overloading resulting from the flattened MLA is transferred to proximal areas such as the knees, hips, and lower back. Flatfoot is recognized as a contributory factor in a wide variety of medical conditions, including lower limb musculoskeletal pathologies such as plantar fasciitis Achilles tendonitis, and patella-femoral joint pain.

Flatfoot deformities are commonly treated using some form of orthotic device. Such devices are designed to provide stability and to realign the foot arch, and have a demonstrable success in alleviating patients’ symptoms

Anatomy

Flatfeet are an anatomical alteration which can occur in one foot or in both feet. The most common structural difference in flatfeet is found to be rear-foot varus which in turn causes excessive pronation of the foot. In addition, deepened navicular cup, widened talus articular surface, proximally faced talus, and higher positioned navicular articular surface can be seen. These alterations cause the MLA to collapse resulting in a loss of arch height. When this loss of arch height is observable in both non-weight bearing and weight bearing positions, it is termed as rigid flatfeet. Contrarily, when a normal MLA height is present in non-weight bearing condition and collapses with weight bearing is identified as flexible flatfeet.

Symptoms

The most identifiable symptoms and characteristics of flat feet are the decrease or lack of arches in the feet (especially when weight bearing) and pain / fatigue along the inner side of the feet and arches.

Some issues caused by flat feet include:
• Inflammation of soft tissue
• Foot, arch, and leg fatigue
• Heel, foot, and ankle pain
• Knee, hip, and lower back pain
• Rolled-in ankles
• Abnormal walking patterns
• Shin splints
• Bunions
• Hammertoe
• Arthritis
• Plantar fasciitis
• Posterior tibial tendon dysfunction (PTTD)

Causes

Flatfeet is not unusual in infants and toddlers, because the foot’s arch hasn’t yet developed. Most people’s arches develop throughout childhood, but some people never develop arches. People without arches may or may not have problems.
Some children have flexible flatfeet, often called flexible flatfoot, in which the arch is visible when the child is sitting or standing on tiptoes but disappears when the child stands. Most children outgrow flexible flatfeet without problems.
People without flatfeet can also develop the condition. Arches can collapse abruptly after an injury. Or the collapse can happen over years of wear and tear. Over time, the tendon that runs along the inside of the ankle and helps support the arch can get weakened or tear. As the severity increases, arthritis may develop in the foot.

Diagnosis

The observation of the feet mechanics from the front and back and also toes stand. The strength test in the ankles and locate the main area of pain. The wear pattern on the shoes also may reveal information about the feet.

Tests

Imaging tests that can be helpful in diagnosing the cause of foot pain may include:
• X-rays. A simple X-ray uses a small amount of radiation to produce images of the bones and joints in the feet. It’s particularly useful in evaluating alignment and detecting arthritis.
• CT scan. This test takes X-rays of the foot from different angles and provides much more detail than a standard X-ray.
• Ultrasound. Ultrasound may be used when a tendon injury is suspected. Ultrasound uses sound waves to produce detailed images of soft tissues within the body.
• MRI. Using radio waves and a strong magnet, MRIs provide excellent detail of both bone and soft tissues.

Treatment

Many people with flat feet don’t have significant problems or need treatment. However, if foot pain, stiffness or other issues occur health provider might recommend nonsurgical treatments. Rarely, people need surgery to fix rigid flat feet or problems with bones or tendons.
Treatments include:
• Nonsteroidal anti-inflammatory drugs (NSAIDs), rest and ice to ease inflammation and pain.
• Physical therapies to stretch and strengthen tight tendons and muscles, improving flexibility and mobility.
• Supportive devices like foot orthotics, foot or leg braces and custom-made shoes.

Exercises

Toes elevations: Start by standing with your feet shoulder-width apart and flat on the ground. Slowly raise your toes off the ground as high as you can, while keeping your heels on the ground. Hold this position for a few seconds, then lower your toes back down to the ground. Repeat for several repetitions.

Toes scrunches: Begin by sitting in a chair with your feet flat on the ground. Scrunch your toes together as tightly as you can, then relax them. Repeat for several repetitions.

Double/Single leg raises: Start by lying on your back with your legs straight out in front of you. For double leg raises, raise both legs off the ground at the same time, keeping them straight. For single leg raises, raise one leg off the ground while keeping the other leg straight and on the ground. Hold the raised leg in the air for a few seconds, then lower it back down to the ground. Repeat for several repetitions on each leg.

Standing single leg balance: Stand on one foot with your knee slightly bent. Hold this position for as long as you can, up to 30 seconds, then switch to the other foot. For a greater challenge, close your eyes or stand on a pillow or unstable surface.

Toes walks: Start by standing with your feet flat on the ground. Slowly walk forward on your toes, keeping your heels off the ground. Walk for a few steps, then lower your heels back down to the ground. Repeat for several repetitions.

Heel walks: Begin by standing with your feet flat on the ground. Slowly walk forward on your heels, keeping your toes off the ground. Walk for a few steps, then lower your toes back down to the ground. Repeat for several repetitions.

Calf muscle stretch: Start by standing facing a wall with your hands on the wall at shoulder height. Take one step back with one foot, keeping your heel on the ground. Bend your front knee, keeping your back leg straight, until you feel a stretch in your calf muscle. Hold this position for 15-30 seconds, then switch legs and repeat.

Prevention

Although flat feet are often hereditary and cannot be completely prevented, there are strategies that can be put in place to help reduce the risk of developing flat feet symptoms. Here are some preventative measures:
Footwear:
Choose supportive footwear with good arch support and cushioning and try to avoid shoes with flat soles.
Consider using orthotic insoles or arch supports that are designed to provide additional support and alignment for the feet.

Foot Exercises:
Perform exercises to strengthen the muscles of the feet and lower legs. This may include toe curls, heel raises, and toe taps. Consult with a healthcare professional or a physical therapist for guidance on appropriate exercises.

Maintain a Healthy Weight:
Excess body weight can contribute to the flattening of the arches. Maintaining a healthy weight through a balanced diet and regular exercise can help reduce stress on the feet.

Avoid Prolonged Standing:
If your job or activities involve prolonged periods of standing, take breaks to rest and stretch your feet. Consider using supportive mats or insoles in areas where you stand for long durations.

Stretching Exercises:
Perform stretching exercises to maintain flexibility in the Achilles tendon and calf muscles. This can help prevent excessive pronation and contribute to better foot alignment.

Avoid High Heels:
Limit the use of high-heeled shoes, as they can contribute to foot misalignment and increase stress on the arches. Opt for shoes with a moderate heel height.

Gradual Changes in Physical Activity:
If you are starting a new physical activity or exercise routine, make changes gradually. Sudden increases in intensity or duration can place additional stress on the feet.

Proper Body Mechanics:
Pay attention to your body mechanics and posture. Maintain good posture while standing and walking and be mindful of how you distribute your weight on your feet.

Consult with a Specialist:
If you have concerns about your foot structure or experience symptoms of flat feet, consult with a podiatrist or orthopaedic specialist. They can provide a thorough evaluation and recommend appropriate interventions, such as orthotics or physical therapy.

Consider Arch-Supporting Activities:
Engage in activities that naturally support the arches, such as swimming or biking. These activities can be less stressful on the feet compared to high-impact sports.
It’s important to note that preventive measures may vary based on individual factors, and what works for one person may not be suitable for another. If you have specific concerns about flat feet or foot health, seeking advice from a healthcare professional is recommended. They can provide personalized recommendations based on your unique circumstances.

Exercises for Knee Pain

Exercises for Knee Pain 

Early stage of rehab

Swimming is often recommended for knee pain as it is a low-impact form of exercise that can help improve joint range of motion, flexibility, and strengthen the muscles around the knee without putting excessive stress on the joint. The buoyancy of the water reduces weight bearing on the knee, allowing for a comfortable and pain-free workout.

Strengthening

  1. Glute Bridge: Laying flat on your back with your knees bent and feet flat on the ground, tighten your glutes and lift your hips towards the ceiling. Hold for a few seconds, then lower back down. Repeat for several repetitions.
  2. Sitting Knee Extension: Sitting in a chair with your legs extended, lift one leg up while keeping the other foot flat on the ground. Hold for a few seconds, then lower back down. Repeat for several repetitions on each leg.
  3. Unweighted Flexion: Stand behind a chair, using the back of the chair for balance. Flex one leg up to about a ninety-degree angle, hold for ten seconds, then go back to starting position. Switch legs and do ten repetitions with each leg.
  4. Heel and Calf Raises: Stand with your feet hip-width apart. Raise up on the balls of your feet, then lower back down. Repeat for several repetitions. To make the exercise more challenging, try doing calf raises on just one foot at a time.

Stretching/ Mobility

  1. Ankle Stretch: Stand facing a wall and place one foot behind the other. Keep your front knee slightly bent and press your heel into the ground. Hold this position for 15 to 30 seconds, then switch to the other foot.
  2. Single Hamstring Stretch: Sit on the ground with one leg straight in front of you and the other leg bent with the foot flat on the ground. Reach forward and hold onto your straight leg, keeping your back straight. Hold this position for 15 to 30 seconds, then switch to the other leg.
  3. IT Band Stretch: Lie on your side with the affected leg on top. Bend the knee of the top leg and use your hand to gently pull it toward your chest. Hold this position for 15 to 30 seconds, then switch sides.
  4. Quadriceps Stretch: Stand facing a wall and place your hand on it for balance. Bend your knee and bring your heel towards your buttock. Hold onto your ankle and hold this position for 15 to 30 seconds, then switch to the other leg.

Progression

Warming up before doing exercises for the knee is important to prevent injury and to improve performance. Warming up increases blood flow to the knee, which can help to reduce stiffness, improve range of motion, and reduce the risk of injury. This can also help to prepare the muscles, tendons, and ligaments for the workout ahead, reducing the risk of strains or tears. Warming up can include simple exercises like walking or light jogging, or dynamic stretching to help increase flexibility and range of motion in the knee.

Strengthening

  1. Squats/Single Leg Squat: Start by standing with your feet shoulder-width apart. Lower your body down as if you are sitting back into a chair, keeping your weight in your heels. Push back up to the starting position. For a single leg squat, lift one foot off the ground and perform the squat on just one leg.
  2. Lunges: Start by standing with your feet hip-width apart. Take a big step forward with your right foot, bending both knees to 90 degrees. Your back knee should come close to the ground, and your front knee should be directly over your ankle. Push back up to the starting position and repeat with the other leg.
  3. Side Leg Raises: Start by lying on your side with your legs extended. Keeping your legs straight, lift your top leg up as high as you can, then lower it back down. Repeat for the desired number of repetitions, then switch sides.
  4. Single Leg Deadlifts: Start by standing on one leg with a slight bend in the knee. Reach forward with your other leg while keeping your back straight. Keep reaching forward until your other leg is parallel to the ground. Push back up to the starting position.
  5. Step Up: Stand in front of a step or bench and place your right foot on the step. Push down through your right foot to lift yourself up onto the step, keeping your left foot off the ground. Step down with your left foot and repeat with the other leg.
  6. Crab Walk with Elastic Band: Start by sitting on the floor with your legs bent and your feet flat on the ground. Loop an elastic band around your legs, just above your knees. Keeping your feet on the ground,

Obvioucly knee pain can come in many forms for many reasons and one size doesn’t fit all. At livewell we like to understand you the person and how this knee pain has happened before designing rehabilitation programes. If you would like to have a consultation with one of our sports therapists or physiotherapists to understand the reasons for your pain and ways in which you can treat your pain, whether through exercise, stretching, massage or any one of the services we offer then please contact us via email or tel on 07939 212 739