What is Tennis Elbow?

What is Tennis Elbow?

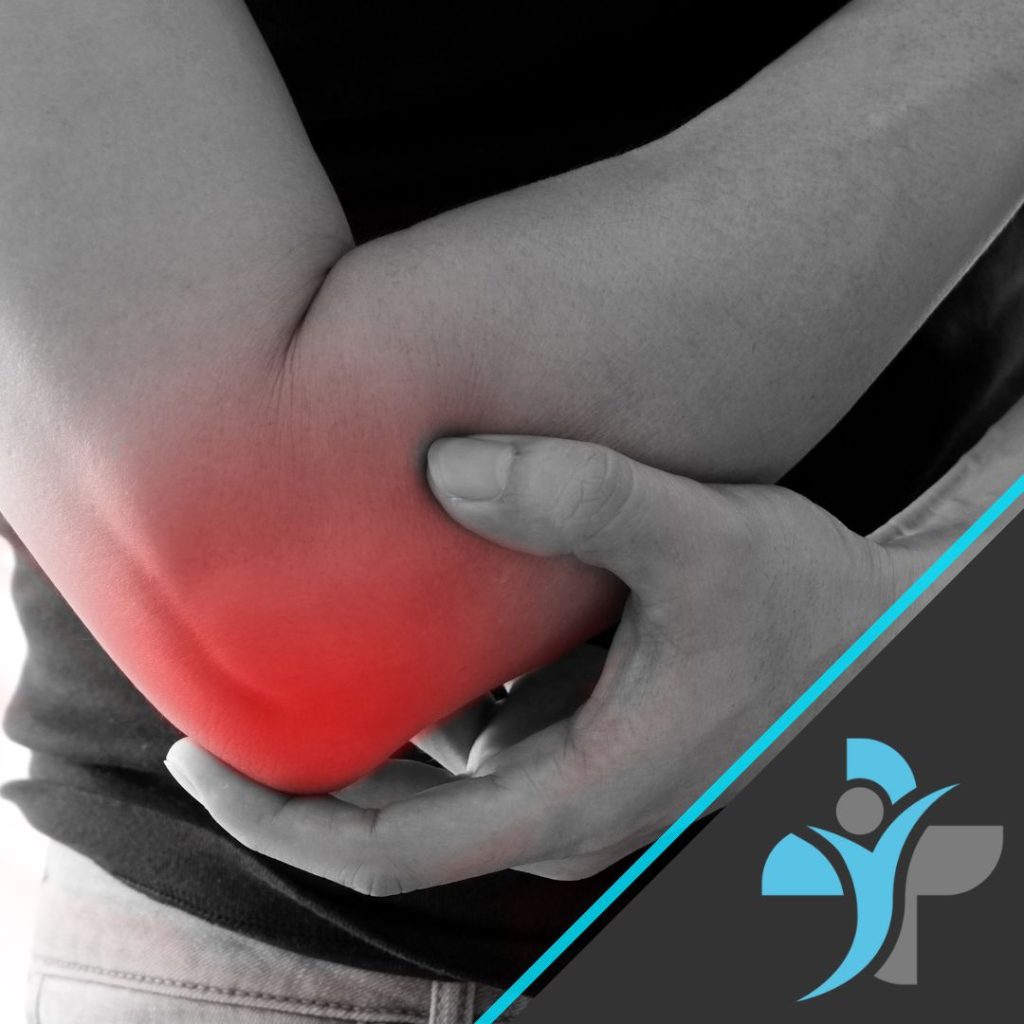
Tennis elbow, officially termed lateral epicondylitis, affects more than just athletes. This prevalent condition involves pain and inflammation in the tendons that link the forearm muscles to the outer part of the elbow.

Repetitive actions such as gripping, twisting, and lifting can often cause this ailment. Activities like going to your local gym, painting, carpentry, and even typing may trigger these motions, leading to small tears in the tendons. Consequently, this results in inflammation and discomfort on the elbow’s exterior, which can intensify with continued use. Symptoms may also include forearm weakness, reduced grip strength, elbow stiffness, and pain extending down the arm.

What is tennis elbow

To diagnose tennis elbow, a physical examination is typically performed alongside a review of your medical history and activities. Imaging tests might be used to exclude other potential conditions but in the main a sports therapist, physiotherapist or doctor can accurately diagnose this condition.

Treatment aims to alleviate pain, reduce inflammation, and facilitate healing. This can involve rest, ice application, specific physical therapy exercises, bracing, over-the-counter pain relievers, or sometimes corticosteroid injections. In general we see huge improvements in the condition through a well strategised and dianamic recoveyr and rehabilitation regime.

Preventing tennis elbow is crucial, particularly if your job or hobbies involves repetitive arm movements. It is important to warm up before engaging in such activities, maintain proper form, take regular breaks, strengthen forearm muscles, and use ergonomic tools when necessary.

If you think you might have tennis elbow, it’s important to consult a healthcare provider for a precise diagnosis and tailored treatment plan. With prompt intervention and appropriate care, you can effectively manage the condition and resume your regular activities. If you would like to read more about the condition, we have written an article that goes into much more detail which can be found here.

Alternatively if you would like to book one of our sports therapists or physiotherapists to conduct a thorough in person review, treatment and then provide you with the exercises to rehabilitate this condition then please either make a booking through our online booking system or contact us directly.

Wrist Sprain

Wrist sprains occur most often in the athletic or occupational setting but can occur from overuse at work, home, or in any activity of daily living. Injury to the scapholunate ligament is the most common injury and most common form of carpal instability; hyperextension of the wrist is a common mechanism for this type of injury.

An acute wrist sprain is an injury to a ligament often due to an acute traumatic event or chronic repetitive movements. Wrist sprains occur when a ligament is pathologically stretched, twisted, lacerated, or torn.

The inciting event typically involves the sudden application of a force, excessive load-bearing, or twisting injury mechanisms. In most cases, this results from a fall on the outstretched hand with varying structures injured depending on the position of the hand and wrist at the time of injury. In severe cases, there can be a large tear in multiple wrist ligament(s), which can cause instability of the wrist and may require surgical interventions.

Anatomy

A wrist sprain occurs when the ligaments in the wrist are stretched or torn. The ligaments are the bands of tissue that connect the bones in the wrist and help to stabilize the joint.

There are several different ligaments in the wrist, including the radial collateral ligament, ulnar collateral ligament, and the intercarpal ligaments. A sprain can occur in any of these ligaments, but the most common type of wrist sprain is a sprained ligament on the thumb side of the wrist.

Symptoms

The symptoms of a wrist sprain can vary depending on the severity of the injury, but common signs include:

  • Pain: This is the most common symptom of a wrist sprain. The pain is typically located in the affected area and can be sharp, dull, or aching. Pain may be felt when gripping or moving the wrist.
  • Swelling: The wrist may become swollen due to inflammation of the ligaments and the accumulation of fluid in the joint.
  • Bruising: Bruising or discoloration of the skin can occur due to bleeding from the damaged blood vessels.
  • Stiffness: The wrist may feel stiff and difficult to move due to the injury. This is a common symptom of a more severe sprain.
  • Weakness: The affected wrist may feel weak and unstable due to the damage to the ligaments.
  • Instability: The joint may feel loose or unstable, and the wrist may move in an abnormal way.
  • Deformity: In severe cases, there may be a visible deformity of the joint, such as a bend or twist in the wrist.
  • Snapping or popping sensation: Some people may experience a snapping or popping sensation in the joint when they move their wrist.

Causes

There are several common causes of wrist sprains, including:

  • Trauma: A fall or impact to the wrist can cause a sprain. For example, landing on an outstretched hand during a fall can cause a sprain.
  • Overuse: Repetitive motions, such as those involved in sports like gymnastics or tennis, can cause small tears in the ligaments over time, leading to a sprain.
  • Osteoarthritis: This is a degenerative condition that can weaken the ligaments and make them more susceptible to injury.
  • Rheumatoid arthritis: this is an autoimmune disorder that causes inflammation in the joints, leading to damage in the ligaments.
  • Fractures: A fracture can also cause a sprain by damaging the ligaments.
  • Hypermobility: People with hypermobility or ligament laxity are more prone to sprains, as their ligaments are more flexible and can stretch more easily.

Diagnosis

Diagnosis of a wrist sprain typically begins with a physical examination by a healthcare provider. The provider will examine the affected joint for signs of pain, swelling, and tenderness.

They may also move the joint in different directions to assess for range of motion and stability. Imaging tests may also be used to diagnose a wrist sprain. X-rays can help to rule out any fractures and can also show if there is any damage to the bones in the joint. An MRI or CT scan can also be used to confirm a diagnosis and to determine the severity of the injury.

Once a diagnosis of a wrist sprain is made, treatment can begin.

Treatment

Treatment options for a wrist sprain may include:

  • Rest: The affected joint should be rested to allow the ligaments to heal.
  • Ice: Applying ice to the affected area can help to reduce inflammation and pain.
  • Compression: A compression bandage or brace may be used to help reduce swelling and support the joint.
  • Elevation: Keeping the affected joint elevated above the level of the heart can help to reduce swelling.
  • Over-the-counter pain medication: Non-steroidal anti-inflammatory drugs (NSAIDs) such as ibuprofen can help to reduce pain and inflammation.
  • Physical therapy: Physical therapy and rehabilitation exercises may be prescribed to restore range of motion and strength in the joint.
  • Surgery: In severe cases, surgery may be necessary to repair or reconstruct the damaged ligaments.

Recovery time for a wrist sprain can vary depending on the severity of the injury. Mild sprains may take several weeks to heal, while more severe sprains can take several months to heal. It is important to follow the treatment plan and any physical therapy or exercise recommendations provided by a healthcare provider to help ensure a full recovery.

It’s important to note that even after a wrist sprain has healed, it may be more susceptible to future injuries. Therefore, it is important to take steps to prevent future sprains, such as wearing a brace or splint during activities that put the wrist at risk, and doing exercises to strengthen the wrist.

Exercises

The best exercises for a wrist sprain include:

  • Wrist flexion and extension: Gently bend and straighten your wrist to improve range of motion.
  • Wrist pronation and supination: Rotate your wrist to improve strength and flexibility.
  • Wrist circles: Rotate your wrist in both clockwise and counter clockwise directions to improve flexibility.
  • Wrist stretches: Stretch your wrist in different directions to improve flexibility.
  • Grip strengthened exercises: Squeeze a ball or use a hand gripper to improve grip strength.

It is important to consult a doctor or physical therapist before starting any exercise program, particularly if you have a severe sprain. They can advise you on the appropriate exercises for your specific injury and guide you through the healing process.


Prevention

  • Warm up before any physical activity: Take the time to stretch your wrists and hands before participating in any physical activity that requires repetitive wrist motions, such as playing sports or typing.
  • Use proper technique: When participating in sports or other activities that require wrist movements, make sure to use proper technique to avoid putting excessive strain on your wrists.
  • Strengthen your wrists: Regularly performing exercises that strengthen the muscles and tendons in your wrists can help prevent injury. Simple exercises such as wrist curls with light weights or resistance bands can be effective.
  • Take breaks and alternate activities: If you perform repetitive motions with your wrists for extended periods, take frequent breaks to rest and stretch your wrists. Additionally, alternating activities that use different muscle groups can help prevent overuse injuries.
  • Wear appropriate gear: Wearing supportive wrist braces or splints during physical activity can help prevent wrist sprains by providing extra support and stability to the joint.
  • Maintain good posture: Poor posture can put extra strain on your wrists, so make sure to maintain good posture while performing any activity that requires wrist movements.

How effective is Kinesio taping?

How effective is kinesio taping ?

Tips for knees, shoulder, ankles, wrists.

Overview

Kinesio taping is a method of taping the skin to provide support and stability to muscles and joints, while also allowing for full range of motion. The tape is made of flexible, breathable material that stretches and moves with the skin. It is applied in specific patterns depending on the area of the body being treated.

Kinesio taping is often used to help alleviate pain, reduce inflammation, improve muscle function, and promote healing. It is also used as a preventative measure to improve muscle activation and stability, as well as to support joints during movements. It’s often used to help with conditions such as back pain, knee pain, sprains, strains and sports injuries.

Kinesio therapy is a non-invasive, drug-free method of treatment, and it is generally considered safe for most people. However, it is best to consult with a physical therapist or doctor before using Kinesio taping, as it may not be appropriate for everyone, especially for those with certain skin conditions or allergies.

How effective is Kinesio taping?

Kinesio taping is relatively new method of treatment and research on its effectiveness is still ongoing. Some studies have shown that Kinesio taping can be effective in reducing pain and inflammation, improving muscle function, and promoting healing.

For example, a study published in The Journal of Athletic Training found that Kinesio taping was effective in reducing pain and improving function and reduced pain in people with the patellofemoral pain syndrome.

However, it is important to note that the effectiveness of Kinesio taping can vary depending on the condition being treated and the individual. Some studies have found that Kinesio taping is no more effective than other treatments such as physical therapy or exercise. It is important to note that more research is needed to fully understand the effectiveness of Kinesio taping and to determine the best ways to use it.

Knee Kinesio taping

Injuries in which the Kinesio taping might be helpful:

Patellofemoral pain syndrome:
This condition is characterized by pain in the front of the knee and around the kneecap, often caused by overuse or improper alignment of the kneecap. Kinesio taping can help to stabilize the kneecap and reduce pain.

Anterior cruciate ligament injuries (ACL):
The ACL is a ligament that helps to stabilize the knee. Injuries to the ACL can cause pain, instability, and difficult walking. Kinesio taping can help to provide support and stability to the knee joint following and ACL injury.

Meniscus injuries:
The meniscus is a piece of cartilage that helps the cushion the knee joint. Injuries to the meniscus can cause pain, swelling, and difficulty walking. Kinesio taping can help to support and stabilize the knee joint following a meniscus injury.

Osteoarthritis:
This degenerative condition that causes pain and stiffness in the knee joint. Kinesio taping can help to reduce pain and improve function in individuals with knee osteoarthritis.

Patellar tendonitis:
This overuse injury that causes pain and inflammation in the tendon that connects the kneecap to the shin bone. Kinesio taping can help to reduce pain and improve function in individuals with patellar tendonitis.

Ankle Kinesio Taping

Sprains:
Kinesio taping can be used to support the ankle during the healing process and reduce swelling and pain.

Tendinitis:
Taping can be used to support the tendons and reduce stress on the area.

Plantar fasciitis:
Taping can be used to provide support for the foot and help reduce pain and inflammation in the heel.

Ankle instability:
Taping can be used to provide support and help stabilize the ankle joint, which can reduce the risk of reinjury.

Overuse injuries:
Taping can be used to support the muscles and tendons of the ankle and reduce the risk of overuse injuries such as stress fractures.

Shoulder Kinesio Taping

Rotator cuff strains and tears:
Kinesio taping can provide support and stability to the rotator cuff muscles, helping to reduce pain and inflammation while promoting healing.

Shoulder Impingement:
Kinesio taping can help to correct muscle imbalances and improve posture, which can help to reduce the risk of shoulder impingements.

Frozen shoulder (Adhesive capsulitis):
Kinesio taping can improve range of motion and reduce pain during the frozen stage of the condition.

Dislocated shoulder:
Kinesio taping can provide support and stability to the shoulder joint, helping to reduce the risk of further dislocations.

Tendinitis:
Kinesio taping can help to reduce pain and inflammation and promote healing of the tendons.

Wrist Kinesio Taping

Carpal Tunnel syndrome:
Taping can be used to provide support for the median nerve and help reduce pain and inflammation in the wrist.

Wrist instability:
Taping can be used to provide support and help stabilize the wrist joint, which can reduce the risk of reinjury.

If you believe that you could benefit from some Kinesio Taping then please contact a member of our team or book an appointment online with one of our kinesio taping experts!

tel: 0330 043 2501 or via email on: info@livewellhealth.co.uk

Adductor Strain

Adductor strain or injury to the adductor muscle group is a common cause of medial leg (inside leg) and groin pain, especially among athletes. A groin strain is an acute injury to the muscles on the inside of the thigh, known as the adductor muscles. These muscles help to stabilize the trunk and move the legs inward. A strain typically occurs because of an athletic injury or awkward movement of the hip joint, which leads to stretching or tearing of the inner thigh muscles.
A strain injury is graded I-III based upon its severity. Mild strains involve overstretching of the muscle, whereas more severe strains can involve complete muscle tears. Most injuries to the adductor muscles are Grades I or II.

GRADE 1 GROIN STRAIN

Grade I is a mild strain (tear) with some pain, bruising, and tenderness, but no significant fiber disruption.

GRADE 2 GROIN STRAIN

A Grade II injury involves injury to the muscle-tendon fibers, this is usually a more serious tear which will severely limit movement. However, the overall integrity of the muscle-tendon unit is preserved.

GRADE 3 GROIN STRAIN

A Grade III injury (or complete rupture) is one that results in a loss of overall muscle/tendon integrity. This serious injury will result in severe pain, swelling, joint instability, and pain associated with movement. It may in some cases mean the muscle detatching from it’s attachment point.

Anatomy

The adductor complex includes the three adductor muscles (longus, magnus, and brevis) of which the adductor longus is the most injured. All three muscles primarily provide adduction of the thigh. Adductor longus provides some medial rotation. The adductor magnus also has an attachment on the ischial tuberosity, giving it the ability to extend the hip. In open chain activation, the primary function is hip adduction. In closed chain activation, they help stabilize the pelvis and lower extremity during the stance phase of gait. They also have secondary roles including hip flexion and rotation.

Symptoms

Depending on the underlying cause, pain can be mild or severe, come on gradually or suddenly, and vary in quality (dull, sharp, throbbing, or even burning). Common symptoms include:

  • Pain and tenderness in the groin and the inside of the thigh
  • Sudden onset of pain sometimes accompanied by the sensation of a pop in the inner thigh
  • Failure to continue activity after initial onset of pain
  • Pain when you bring your legs together or when you raise your knee
  • Bruising may develop, and limping may also be a symptom

Causes

Most injuries can be managed conservatively by their primary care provider with rest, ice, physical therapy, and a graded return to play.

  • previous hip or groin injury
  • age
  • weak adductors
  • muscle fatigue
  • decreased range of motion
  • inadequate stretching of the adductor muscle complex

Diagnosis

Radiographic evaluation is the initial modality of choice for suspected adductor strain. Anteroposterior views of the pelvis and frog-leg view of the affected hip are recommended as initial imaging studies. In most patients, these images will be normal in appearance; however, occasionally one may observe an avulsion injury. These images can also help evaluate for other causes of groin pain such as osteitis pubis, apophyseal avulsion fractures, and pelvic or hip stress fractures.

If further imaging is needed, magnetic resonance imaging (MRI) is recommended. This is likely to show muscle oedema and haemorrhage at the site of injury. If there is a bony injury, this will be better elucidated on the MRI.

Musculoskeletal ultrasound can further visualize the tendon and bony attachment sites, muscles, ligaments, and nerves. Ultrasound can be used to identify the area and extent of the injury and used to evaluate periodically during the recovery phase.

Treatment

Fortunately, there are several effective treatment options for adductor strains, including rehabilitation and massage. In this article, we will discuss the various treatment options for adductor strains, with a particular focus on the benefits of rehabilitation and massage therapy.

Rest and Ice / Heat Therapy

The first step in treating an adductor strain is to rest the affected muscle. This means avoiding any activities that put stress on the muscle, such as running, jumping, or kicking. In addition, applying ice and heat to the affected area through contrast bathing can help reduce swelling and pain and then through the heat stimulate repair. To contrast bathe we recommend 5 minutes ice, 10 minutes heat, 3 times round 3 times a day. This will equate to 45 minutes at a time.

Compression and Elevation

Compression and elevation are also important in the early stages of adductor strain treatment. Compression can help reduce swelling and provide support to the injured muscle, while elevation can help improve blood flow and reduce inflammation. A compression bandage should be applied snugly but not too tightly, and the affected leg should be elevated above the level of the heart as much as possible.

Physical Therapy / Physiotherapy

Once the initial swelling and pain have subsided, physical therapy can help restore strength and flexibility to the injured muscle. Physical therapy may include exercises to improve range of motion, strengthen the muscles, and improve balance and coordination. Your physical therapist may also use stretching, to help relieve muscle tension and improve circulation to the affected area.

Massage Therapy

Massage therapy is a type of manual therapy that involves manipulating the soft tissues of the body, including muscles, tendons, and ligaments. Massage can help reduce muscle tension and improve circulation, which can help promote healing and reduce pain and stiffness. Massage therapists may use a variety of techniques, including sports massage, deep tissue massage, myofascial release, and trigger point therapy, depending on the specific needs of the patient.

Massage therapy can be especially beneficial for adductor strains because it can help relieve muscle tension and improve circulation to the affected area. Massage can also help reduce pain and stiffness, which can make it easier to perform physical therapy exercises and other activities of daily living.

In conclusion, adductor strains can be a painful and debilitating injury, but there are many effective treatment options available. If you are experiencing symptoms of an adductor strain, it is important to seek advice for a specialist, livewell and our team of highly qualified soft tissue specialists can help. If you want to find out more information or to book an appointment, please contact us.

Exercises

An adductor strain can be a painful and frustrating injury, but with the right exercises and a progressive plan, you can get back to your normal activities in no time. It’s important to start with gentle exercises and progress gradually to more challenging ones as your injury heals. Here are some exercises you can do on a weekly basis to help recover from an adductor strain:

Week 1: Isometric Exercises

Isometric exercises involve contracting the muscle without moving it. They are gentle exercises that can help improve blood flow to the injured area and prevent further damage. To perform isometric exercises for your adductor muscles, lie on your back with your legs straight and your feet pointing up. Place a small pillow or rolled-up towel between your knees and squeeze your knees together as hard as you can for 5-10 seconds. Release and repeat for 10 repetitions, three times per day.

Week 2: Passive Stretching

After the initial pain and swelling have subsided, passive stretching can help improve range of motion and flexibility in the injured muscle. To perform a passive stretch for your adductor muscles, sit on the floor with your legs straight out in front of you. Spread your legs apart as far as you can, then gently lean forward until you feel a stretch in your inner thighs. Hold the stretch for 20-30 seconds and repeat for 3-4 repetitions, twice per day.

Week 3: Active Stretching

Active stretching involves using your muscles to move your joints through a full range of motion. It can help improve strength and flexibility in the injured muscle. To perform an active stretch for your adductor muscles, sit on the floor with your legs straight out in front of you. Spread your legs apart as far as you can, then gently push your knees down toward the floor using your inner thigh muscles. Hold the stretch for 10-15 seconds and repeat for 10 repetitions, twice per day.

Week 4: Resistance Training

Resistance training involves using weights or resistance bands to challenge your muscles and improve strength. To perform resistance training for your adductor muscles, lie on your side with your injured leg on top. Place a resistance band around your ankles and squeeze your legs together against the resistance of the band. Hold for 10-15 seconds and repeat for 10 repetitions, three times per day.

Week 5: Functional Training

Functional training involves performing exercises that mimic the movements you make in your daily activities. It can help improve balance, coordination, and overall function. To perform functional training for your adductor muscles, stand with your feet shoulder-width apart and slowly shift your weight onto your injured leg. Raise your other leg to the side as high as you can without pain, then lower it back down. Repeat for 10 repetitions, three times per day.

In conclusion, a progressive exercise plan is essential for recovering from an adductor strain. Starting with gentle isometric exercises and gradually progressing to more challenging resistance and functional exercises can help improve strength, flexibility, and overall function in the injured muscle. Be sure to consult with your healthcare provider before starting any exercise program to ensure it is safe and appropriate for your specific injury.

Prevention

  • Work on core stability. Having good core and pelvic stability provides a solid base for sport-specific movements and reducing the chance of adductor strains.
  • Dynamic warm-up! This is easily overlooked, but important. Prior to training and competing, ensure you perform a complete warm-up, including slow to fast movements, dynamic stretches (movement stretches) and sports-specific drills.
  • Strengthen the lateral hip muscles, mainly the gluteal muscles. This will help with pelvic stability
  • Stretch the inner thigh and outer thigh muscles on a daily basis.
  • Regularly get manual therapy and massages from certified physiotherapists, athletic therapists or massage therapists. This will help to get the muscles flexible and break down any trigger points or scar tissue that can lead to injury.
  • Practice sport-specific drills, change of direction and cutting manoeuvres which commonly cause groin strains. This will help the muscles to adapt and become stronger at performing this kind of movement.
  • Strengthen the inner thigh muscles using weight machines and resistance bands. It is especially important to strengthen the muscles in the movement which caused the injury, to prevent a reoccurrence.
  • Improve your proprioception. This is our sense of where each body part is in space and is similar to balance. Proprioception affects the way we move, especially when our balance is compromised and is therefore important in avoiding all injuries.
  • Get plenty of rest and avoid over-training! If you train too much or for too long fatigue sets in, which increases the risk of injury.

If you feel like you have an adductor strain then please contact a member of our team or make a booking online.

AC Joint Inury

The AC (acromioclavicular) joint is where the shoulder blade (scapula) meets the collarbone (clavicle). The highest point of the shoulder blade is called the acromion. Strong tissues called ligaments connect the acromion to the collarbone, forming the AC joint.

Most AC Joint injuries are treated conservatively using various combinations of strengthening exercises, following the immobilisation phase, once pain permits. Surgery is usually reserved for cases where there is a complete dislocation of the AC Joint (Grade 3), or in cases where a less severe injury fails to respond adequately to conservative treatment.

Anatomy

The Acromioclavicular Joint, or AC Joint, is one of four joints that comprises the Shoulder complex. The AC Joint is formed by the junction of the lateral clavicle and the acromion process of the scapula and is a gliding, or plane style synovial joint. The AC Joint attaches the scapula to the clavicle and serves as the main articulation that suspends the upper extremity from the trunk.

The primary function of the AC Joint is:

To allow the scapula additional range of rotation on the thorax.

Allow for adjustments of the scapula (tipping and internal/external rotation) outside the initial plane of the scapula in order to follow the changing shape of the thorax as arm movement occurs.

The joint allows transmission of forces from the upper extremity to the clavicle.

Symptoms

  • Pain at the end of the collar bone.
  • Pain may feel widespread throughout the shoulder until the initial pain resolves; following this, it is more likely to be a very specific site of pain over the joint itself.
  • Swelling often occurs.
  • Depending on the extent of the injury, a step-deformity may be visible. This is an obvious lump where the joint has been disrupted and is visible on more severe injuries.
  • Pain on moving the shoulder, especially when trying to raise the arms above shoulder height.

Causes

An AC Joint injury often occurs as a result of a direct blow to the tip of the shoulder from, for example, an awkward fall, or impact with another person. This forces the Acromion Process downward, beneath the clavicle. Alternately, an AC Joint injury may result from an upward force to the long axis of the humerus (upper arm bone) such as a fall which directly impacts on the wrist of a straightened arm. Most typically, the shoulder is in an adducted (close to the body) and flexed (bent) position.

Diagnosis

Firstly, for the diagnosis of scapula winging your doctor will look at the shoulder blades for any clear obvious signs of winging. Some patient’s scapula bone may be more visible than others and have distinct scapula winging. The doctor may also ask you to perform arm/ shoulder movements to examine the range of movement and stability at the joint.

One of the main tests that are used to aid in the diagnosis of scapula winging is the serratus anterior test. This is where the patient is asked to face a wall, standing about two feet from the wall and then push against the wall with flat palms at waist level. This test is carried out to identify if any damage is done to the thoracic nerve causing the scapula to wing.

Treatment

The traditional literature supports non-operative treatment for grade I and II injuries. Patients with grade IV, V and VI injuries benefit from operative treatment, whereas the treatment of grade III injuries remains a controversial issue. 22 Numerous surgical procedures have been described, though there is currently no gold standard for the treatment of AC injuries. The main principle of surgical therapy is accurate reduction of the AC joint in both coronal and sagittal planes. This is achieved either by primary repair or by reconstruction of injured ligaments and maintaining stability to protect this repair or reconstruction. The traditional Weaver-Dunn CA ligament transfer procedure has largely fallen into disfavour today. If the AC joint injury presents within six weeks, it is considered acute. The main goal of treatment is acromioclavicular joint stabilisation. Following techniques are used for stabilisation and reduction of AC joint pain. Whilst you are going through a rehabilitation, strength plan massage can also help with specific soft tissue techniques to eleviate pain and discomfort and inflamation such as lymphatic drainage massage.

Exercises

Initially, complete rest, immobilization and regular application of ice or cold therapy are important to reduce pain and inflammation. Mobility exercises can begin only once shoulder movement is pain-free. This will normally be 7-14 days for grades 1 and 2 sprains. Grade 3 injuries are more frequently treated conservatively, without surgery, but will require an even longer rest/healing period. If the shoulder has been immobilized for a period of time, then it may have lost mobility or range of motion.

  • Pendulum exercises can begin as soon as the ligament has healed, and pain allows. Gently swing the arm forwards, backward, and sideways whilst lying on your front or bent over as seen opposite.
  • Gradually increase the range of motion. Repeat this with your arm swinging from side to side as well. Aim to reach 90 degrees of motion in any direction.
  • Front shoulder stretch
  • External rotation stretch
  • Isometric exercises – Strengthening should initially be isometric. This means contracting the muscles without movement.

Resistance band exercises for AC joint sprain:

  • Internal Rotation
  • External Rotation
  • Abduction/lateral raise

Prevention

  • Wearing protective strapping to support a previously injured AC Joint, particularly in contact sports or sports where full elevation of the arm is not so important. Protective padding is also used in sports such as rugby.
  • Warming up, stretching and cooling down.
  • Participating in fitness programs to develop strength, balance, coordination and flexibility.
  • Undertaking training prior to competition to ensure readiness to play.
  • Gradually increasing the intensity and duration of training.
  • Allowing adequate recovery time between workouts or training sessions.

If you feel like you may have an AC Joint injury and would like to know more, please contact our specialist team made up of Physiotherapists and Sports Therapists who deal with these kind of injuries all the time. Alternatively you can make a booking online directly.

Tension Headaches

Tension headaches are the most common type of headache and are caused by muscle tension. Symptoms are often characterised as a dull ache or the feeling of pressure on both sides of the head and are sometimes associated with upper neck pain.

Anatomy

The suboccipital muscles, sternocleidomastoid muscles and trapezius muscles run from the base of the skull, the upper neck and the shoulders. When these muscles become tight and contracted, they may compress the nerves or blood vessels in the head and neck, increasing the pressure. This can result in a dull aching pain in the head and upper neck. This increased pressure may also cause referred pain in which there may be pain around the forehead, temples and eyes.

Symptoms

The symptoms of Tension Headaches can in extreme cases be debilitating. Some of the symptoms can include:

  • Pain on both sides of the head
  • Dull aching head pain
  • Feeling of built up pressure in the head
  • Tightness across forehead
  • Neck ache/pain
  • Tenderness of the scalp, neck and shoulders

Causes

The specific causes of tension headaches are still unclear. Tension headaches are caused by tight, contracted neck muscles and are commonly linked to stress, poor posture, head injury and anxiety. Tension headaches are often linked to running in families and are more common in females.

Diagnosis

Tension headaches are diagnosed by reported symptoms. A full medical exam including other tests may be ran by the GP to rule out any other conditions. Tension headaches can be diagnosed by a discussion with a healthcare professional regarding experienced symptoms.

Treatment

Over the counter painkillers may help relieve pain caused by a tension headache. Heatpacks and gentle stretching may also help relieve symptoms. In some cases stronger medication may be prescribed by the GP for chronic tension headaches.

Sports therapy, physiotherapy and massages can be an excellent treatment for tension headaches. The treatment of the underlying muscle tightness can relieve pressure and consequently reduce symptoms. Treatment sessions may include massage, stretching and mobilisation as well as postural strengthening and advice and education to help reduce symptoms and pain experienced.

Exercises

1. Chin Tucks

  • Purpose: Strengthen the deep neck flexor muscles and improve posture, which can relieve tension in the neck and reduce headache symptoms.
  • How to Perform:
    • Sit or stand with your back straight.
    • Gently tuck your chin toward your chest, as if making a double chin, while keeping your eyes forward.
    • Hold the position for 3-5 seconds, then relax.
    • Repeat for 20-30 repetitions.

2. Cervical Rotation Stretch

  • Purpose: Increase flexibility and reduce muscle tension in the neck, which can help alleviate tension headaches.
  • How to Perform:
    • Sit or stand with your back straight.
    • Slowly turn your head to one side as far as comfortable, keeping your chin level.
    • Hold the stretch for 20 seconds, then return to the centre.
    • Repeat on the other side, performing 3 stretches per side.

3. Upper Trapezius Stretch

  • Purpose: Stretch and relax the upper trapezius muscles, which often become tight and contribute to tension headaches.
  • How to Perform:
    • Sit or stand with your back straight.
    • Gently tilt your head to one side, bringing your ear toward your shoulder, while keeping your shoulders relaxed.
    • Use your hand to gently increase the stretch by pulling your head closer to your shoulder.
    • Hold for 20 seconds, then switch sides. Perform 3 stretches per side.

4. Scapula Pinches

  • Purpose: Strengthen the muscles between the shoulder blades, improving posture and reducing tension in the upper back and neck.
  • How to Perform:
    • Sit or stand with your arms at your sides.
    • Squeeze your shoulder blades together as if trying to pinch something between them.
    • Hold the squeeze for a moment, then relax.
    • Perform 3 sets of 10-20 repetitions.

Prevention

Due to the nature of our lives and the fact tension headaches can come on through a variety of issues. Some of which are part of our day to day life, such as looking down to your phone, working at a computer/desk, performing certain exercises at gym or just generally feeling stressed from work/life etc.

The good news is with the stretches above, if done regularly, it can prevent the onset of tension headaches. Regular deep tissue massages can also help and trying to take time to de-stress and in some cases meditation/yoga type exercises will also help.

It is important, to slow down and take time for yourself.

If you feel like you are struggling with tension headaches and would like some more advice then please contact us directly, alternatively if you feel a professional massage will help then please make a booking today.

ACL Rupture

Anterior cruciate ligament (ACL) is one of the most injured area of the lower body. The ACL is a strong band of tissue that connects your femur to your tibia. These injuries are mainly common in people who partake in sporting activities such as running, football basketball and netball. This is due to the sports involving a lot of pressure onto the knee, with quick agility movements and changing direction suddenly.

Normally people will know instantly when they have injured the ACL as you will hear a loud popping sound, the knee will suddenly feel weak and painful, unable to put any weight onto the joint. It is important that you seek medical care as soon as possible when this occurs and go and see a doctor for a medical examination.

Anatomy

The ACL ligament is a band of connective tissue which passes from the femur to the tibia bones. The origin of the ACL is the posteromedial corner of the medial aspect of the lateral femoral condyle and inserts into the intercondylar notch of the tibia. The ACL is an important ligament as it provides stability to the knee by preventing the tibia from sliding Infront of the femur.

The main two components of the ACL are the anteromedial and posterolateral bundles, thee insert into the tibial plateau. When the knee is in extension the posterolateral bundle is very tight and the anterolateral bundle is laxed, when the knee is then flexed the ACL changes its positioning causing the AMB to allowing the ligaments to hold more anterior tibial load. When this area is injured, it can be hard for the joint to hold its normal function.

Injury to ligaments is usually graded on a severity scale:

Grade 1: The ligament is mildly damaged and has been slightly stretched but will still be able to keep the knee stable.

Grade 2: The ligament will be stretched to a point where it becomes loose, commonly known as a partial tear.

Grade 3: This is usually known as a full rupture/ tear of the ligament where it has been split, leaving the joint unstable. A grade 3 tear is so common with the anterior cruciate ligament.

Symptoms

Common signs and symptoms of ACL injuries are:

  • Loud popping of the knee
  • Pain when walking/ inability to walk
  • Instability
  • Difficulty putting weight on the knee joint
  • Excessive swelling
  • Constant pain

Causes

There are a number of things that can cause these injuries, usually, but not always, around sports. Such as:

  • Sudden change in direction.
  • Planting the foot into the ground whist twisting the leg.
  • Landing awkwardly from a jump.
  • Someone else may cause the injury.
  • Sudden jolt/ stop causing too much pressure onto the knee ligament.

Diagnosis

For the diagnosis of ACL injury your doctor will check your knee for swelling and tenderness, comparing your injured knee to your uninjured knee. The doctor may also move your knee into a variety of positions to assess range of motion and overall function of the joint testing for stability and strength.

Some scans such as an MRI may be used, however a Rupture is easily diagnosed through sight and various movement tests as described above.

Treatment

Once the ACL has encountered a complete rupture, the main treatment to fix this would be surgery. The main focus will be on rebuilding the ACL, this will consist of a complete restructure of the ligament. The doctor will replace the ligament with tissue graft of a tendon, by doing this it allows the graft to act as added support for a new ligament to grow onto.

Other options such as physiotherapy would be recommended to help strengthen and help support the knee joint to get back to its normal function. Exercises and rehabilitation programmes should only be completed once swelling has reduced. Wearing a brace may also be helpful to reduce instability of the knee joint, as well as crutches to take pressure of the knee when walking.

Exercises

Once the rupture has been treated through surgery there is a long road of rehabilitation ahead. Please seek a professional consultation with a registered sports therapist or physiotherapist to get a detailed plan. In the interim, the below exercises can help stregnthen and get you back on the road.

Heel Slides

  • Purpose: Improve knee range of motion and flexibility after an ACL injury.
  • How to Perform:
    • Lie on your back with your legs straight.
    • Slowly slide the heel of the affected leg toward your buttocks by bending your knee as much as possible without pain.
    • Hold the position briefly, then slowly slide the heel back to the starting position.

Isometric Quad Contractions

  • Purpose: Strengthen the quadriceps muscles without moving the knee joint, which is important for stabilizing the knee after an ACL rupture.
  • How to Perform:
    • Sit with your leg straight out in front of you.
    • Tighten your quadriceps (the muscles on the front of your thigh) by pressing the back of your knee down into the floor.
    • Hold the contraction for 5-10 seconds, then relax and repeat.

Prone Knee Flexion

  • Purpose: Improve knee flexion and strength in the hamstrings, which are important for knee stability.
  • How to Perform:
    • Lie face down with your legs straight.
    • Slowly bend the knee of your affected leg, bringing your heel toward your buttocks.
    • Hold briefly at the top, then slowly lower your leg back down.

Heel Raises

  • Purpose: Strengthen the calf muscles, which support the knee and improve overall leg stability.
  • How to Perform:
    • Stand with your feet shoulder-width apart, using a chair or wall for balance.
    • Slowly lift your heels off the ground, rising onto the balls of your feet.
    • Hold for a moment at the top, then slowly lower your heels back down.

Half Squats

  • Purpose: Build strength in the quadriceps, hamstrings, and glutes, which are crucial for knee support without putting excessive strain on the joint.
  • How to Perform:
    • Stand with feet shoulder-width apart.
    • Slowly lower your body by bending your knees, keeping your back straight, until your thighs are about halfway to parallel with the floor.
    • Push through your heels to stand back up.

One Leg Stands and Hold

  • Purpose: Improve balance, stability, and strength in the supporting muscles around the knee.
  • How to Perform:
    • Stand on one leg, using a wall or chair for balance if necessary.
    • Hold the position for 20-30 seconds, keeping your knee slightly bent, then switch to the other leg.

Isometric Knee Flexion and Extension

  • Purpose: Strengthen the muscles around the knee without joint movement, which is beneficial for maintaining strength after an ACL rupture.
  • How to Perform:
    • Sit with your knee slightly bent.
    • For flexion, press your heel into the floor as if trying to bend your knee further, but without actually moving it.
    • For extension, try to straighten your knee by tightening your quadriceps, pressing the back of your knee down into the floor.
    • Hold each contraction for 5-10 seconds, then relax and repeat.

Resist Knee Bike Upright

  • Purpose: Improve range of motion and strength in the knee using a stationary bike, while also providing a low-impact cardiovascular workout.
  • How to Perform:
    • Sit on a stationary bike with the seat adjusted so that your knees are slightly bent at the bottom of the pedal stroke.
    • Start with light resistance and pedal smoothly, gradually increasing resistance as tolerated to challenge your knee muscles.
    • Aim for 10-20 minutes, depending on your comfort and fitness level.

An ACL rupture can be life changing and as such the rehabilitation back to full fitness can be a long, hard road. If you need help with an ACL issue then please contact a member of our team and make a booking with one of our physiotherapists or sports therapists.

Hip Labrum Impingement

Hip labrum impingement may occur when the ball and socket joint is unable to move smoothly within the joint. It is more frequently known as Femoral acetabular impingement (FAI). The ball and socket joint are lined with a layer of cartilage that assists in cushioning the femur bone into the socket, which allows free movement no grinding or rubbing within the joint, resulting in no pain. It is also lined with a ridge of cartilage called the labrum, this will keep the femoral head in its place inside the hip socket enabling extra stability.

Anatomy

The hip is a synovial joint more so known as a ball and socket joint. The ball of the joint is the femoral head (the upper part of the femur) more commonly known as the thigh bone. Within the socket is the acetabulum which is surrounded by the pelvis, this makes up the joint.

The surface of the ball and socket is protected by articular cartilage. This enables the bones in and around the joint to glide easily when performing everyday movements such as walking. The cartilage also helps prevent any friction around the surface of the joint avoiding any sort of impingement. Another feature around the joint is the hip labrum. This fibrocartilage labrum is found within the acetabulum, this enables stability to the joint as the hip has a large range of motion in movements such as flexion, extension, abduction, adduction and rotation.

Causes

Common causes of hip impingement are triggered by the femoral head being covered too much by the hip socket. Repetitive grinding at this joint leads to cartilage and labral damage, causing the feeling of impingement.

Other factors that may affect an individual to suffer with labrum impingement could be that individual may have been born with a structurally abnormal ball and socket joint. Also, movements that involve repetition of the leg moving into excessive range of motion may aid in the injury of hip labrum impingement.

Symptoms

Some common Hip Labrum impingement symptoms are as follows:

  • Stiffness in the hip or groin region
  • Reduced flexibility
  • Pain when performing exercise such as running, jumping movements and walking
  • Groin area pain, especially after the hip is placed into flexion
  • Pain in surrounding areas such as lower back and the groin
  • Pain in the hip even when resting

Causes

When you go to visit your doctor/ health care professional about hip complications they may talk about two main types of hip impingement:

  • Cam impingement
  • Pincer impingement

Cam impingement “occurs because the ball-shaped end of the femur (femoral head) is not perfectly rounded. This interferes with the femoral head’s ability to move smoothly within the hip socket”. 

Pincer impingement “involves excessive coverage of the femoral head by the acetabulum. With hip flexion motion, the neck of the femur bone “bumps” or impinges on the rim of the deep socket. This results in cartilage and labral damage”.

Unfortunately, both these two types can happen at the same time, more so known as combined impingement. Which may cause an individual to experience a lot of pain and discomfort.

Diagnosis

The diagnosis of hip impingement will be given by a doctor based on how you describe your symptoms and after performing a physical examination of the hip.

A passive motion special test that is commonly used for hip impingement is called the FADIR (flexion, adduction and internal rotation). This is where the patient will lie in supine position (on their back) with the legs relaxed, then the doctor will carry out the test:

  1. The affected leg will be raised so that the knee and hip are at a 90-degree angle
  2. The doctor will support the knee and ankle and gently push the entire leg across the midline portion of the patient’s body moving into adduction 
  3. Then whilst keeping the knee in position, the doctor would move the foot and lower calf away from the body into abduction 

People who are suffering with hip impingement would feel pain during stage 3 of the test, however it may be hard to differentiate between each injury as someone not suffering with impingement may still feel pain, so it is always important to test the unfaceted side for a comparison.

Some imagining tests may also be performed such as: 

  • X-Ray – The X-Ray screening may show an irregular shape of the femur bone at the top of the thigh or too much bone around the rim of the hip socket, thus causing the impingement
  • MRI Scans – This may pick up wear and tear of the cartilage which runs along the hip labrum 
  • CT scans may also be performed

Treatment

Non-Surgical Management

Activity Modification

Advise the patient to avoid activities that exacerbate symptoms, such as deep squats, prolonged sitting, or high-impact sports.

Physical Therapy:

  • Stretching Exercises: Focus on stretching the hip flexors, hamstrings, and quadriceps to improve flexibility.
  • Strengthening Exercises: Emphasise strengthening the gluteal muscles, core, and hip stabilisers to support joint function and reduce stress on the hip.
  • Manual Therapy: Incorporate techniques such as joint mobilizations and soft tissue massage to reduce pain and improve range of motion. A deep tissue massage or sports massage may be a good option.

Medications:

  • NSAIDs: Prescribe non-steroidal anti-inflammatory drugs (NSAIDs) to reduce inflammation and alleviate pain.
  • Pain Relievers: Recommend acetaminophen for additional pain management if needed.

Injections:

  • Corticosteroid Injections: Administer corticosteroid injections into the hip joint to reduce inflammation and provide temporary pain relief.

Surgical Interventions

  • Indications for Surgery:Consider surgery if the patient experiences persistent pain and functional limitations despite exhaustive non-surgical treatments.
  • Arthroscopic Surgery:
    • Debridement: Remove bone spurs, damaged cartilage, or any other impinging structures to alleviate pain and improve hip function.
    • Labral Repair: Repair any torn labrum to restore joint stability and function.
  • Post-Surgical Rehabilitation:
    • Early Mobilisation: Initiate gentle range-of-motion exercises soon after surgery to prevent stiffness.
    • Progressive Strengthening: Gradually introduce strengthening exercises as healing progresses, focusing on restoring hip strength and stability.
    • Functional Training: Incorporate functional and sport-specific training to facilitate a return to normal activities and athletic pursuits.

Exercises

    • 1. Hip Flexor Stretches

      • Purpose: Stretch the muscles at the front of the hip to reduce tightness and relieve pressure on the hip joint, which can help alleviate impingement symptoms.
      • How to Perform:
        • Kneel on one knee with the other foot in front, forming a 90-degree angle at both knees.
        • Gently push your hips forward while keeping your back straight until you feel a stretch in the front of your hip.
        • Hold for 20-30 seconds and switch sides.

      2. Piriformis Stretches

      • Purpose: The piriformis muscle, located in the buttocks, can become tight and exacerbate hip issues. Stretching it helps improve flexibility and reduce pressure on the hip joint.
      • How to Perform:
        • Lie on your back with knees bent.
        • Cross one ankle over the opposite knee.
        • Pull the uncrossed thigh toward your chest until you feel a stretch in the buttock of the crossed leg.
        • Hold for 20-30 seconds and switch sides.

      3. Isometric Hip Raises in Abduction

      • Purpose: Strengthen the hip muscles, particularly the abductors, without moving the joint, which is beneficial when movement causes pain.
      • How to Perform:
        • Lie on your back with your knees bent and feet flat on the ground.
        • Place a resistance band around your thighs just above the knees.
        • Gently push your knees apart against the band without lifting your hips.
        • Hold the tension for 10-15 seconds, relax, and repeat.

      4. Glute Bridge

      • Purpose: Strengthens the gluteal muscles and stabilizes the hip, which can reduce stress on the hip joint and support recovery from impingement.
      • How to Perform:
        • Lie on your back with knees bent and feet flat on the floor, hip-width apart.
        • Press your feet into the ground and lift your hips toward the ceiling, squeezing your glutes.
        • Hold at the top for a few seconds before slowly lowering back down.

      5. Single Leg Bridge

      • Purpose: This variation of the glute bridge further challenges the glute and core muscles, improving stability and strength on one side of the body at a time.
      • How to Perform:
        • Begin in the same position as the glute bridge.
        • Lift one leg off the ground, keeping it straight, and then lift your hips using the strength of the supporting leg.
        • Hold at the top, then lower and repeat before switching legs.

      6. Straight Leg Raises (Can Also Use Resistance Band)

      • Purpose: Strengthen the quadriceps and hip flexors without putting undue stress on the hip joint, helping to maintain stability and reduce symptoms.
      • How to Perform:
        • Lie on your back with one leg straight and the other bent.
        • Keeping the straight leg’s foot flexed, slowly lift it toward the ceiling to about a 45-degree angle.
        • Lower the leg slowly and repeat. You can add a resistance band around your ankles for added difficulty.

      Prevention

      • When exercising avoid placing full body weight onto your hip when the legs are positioned in excessive range of motion
      • Do daily stretches morning and night
      • Always rest when needed
      • Perform rehabilitation exercises given by a physiotherapist

If you feel you may have this condition / injury and would like it assessed by a professional our team of sports therapists and physiotherapists can help. Alternatively you can speak to your doctor. Either way please contact us for further information alternatively please make a booking directly online.

Winging Scapula

Scapula winging is a condition that affects the shoulder blades, the shoulder blade bones should usually lay flat against the back of the body. Scapula winging occurs when a person suffers with shoulder problems, causing the shoulder blades to stick out abnormally. The condition of scapula winging is quite rare but some individuals may suffer really bad from the condition and need effective treatment.

The main muscle involved in the cause of scapula winging is the serratus anterior. This muscle originates from the ribs 1-8 and attaches to the anterior surface of the scapula, which pulls the muscle against the ribcage. The long thoracic nerve is stimulated by the serratus anterior, when or if this nerve becomes injured the scapula will be affected as it jolts back adding more force onto the arm. Injuries to the shoulder may affect this nerve causing inflammation and added pressure onto the nerve, consequently triggering the onset of scapula winging.

Anatomy

The scapula more commonly known as the shoulder blade articulates with the humerus at the glenohumeral joint. The scapula has three surfaces: the costal, lateral and posterior.

Costal Surface

The anterior surface of the scapula faces the ribcage. This is where the subscapularis originates (one of the rotator cuff muscles). The coracoid process also originates here which lies underneath the clavicle allowing the pectoralis minor, coracobrachialis and bicep brachii to attach at this region.

Lateral Surface

The lateral surface faces the humerus bone. This is where the glenohumeral joint is situated, the main bones around this area are the glenoid fossa, supraglenoid tubercle and infraglenoid tubercle.

Posterior Surface

The posterior surface of the scapula is the site of the majority of the rotator cuff muscles. These include the Infraspinous fossa and the Supraspinous fossa.

All 3 surfaces of the scapula are important to know to locate the site of pain/ discomfort and understand what is causing the winging.

Symptoms

Scapula winging symptoms may differ as it depends where the location of the muscle or nerve damage is situated. Scapula winging is commonly presented by the shoulder blade sticking out from the back uncharacteristically. This may affect a person from even doing everyday things such as sitting down on a chair that has a hard back or even carrying bags that have straps.

Common symptoms of scapula winging are shown as:

  • Shoulder blades sticking out
  • Pain into the neck, shoulders and arms
  • Weakened muscles surrounding the shoulder blade
  • Tiredness and exhaustion when performing simple tasks
  • Pain and discomfort around the area
  • Inability to lift arms over the head
  • Sagging of the scapula

Causes

Scapula winging Is triggered by an individual sustaining a severe injury to any muscles that control the scapula. The serratus anterior is one of the main muscles that enables a person to lift the arm above shoulder level, therefore when this is injured it can cause many problems within the shoulder region.

The main causes of scapula winging are:

    • Nerve damage to the long thoracic nerve
    • Serratus anterior weakness
    • Weakness in the rotator cuff muscles (supraspinatus, infraspinatus, teres minor and subscapularis)
    • Compression on the dorsal scapula nerve (controls the Rhomboid muscles)
    • Weakness in the trapezius

Diagnosis

Firstly, for the diagnosis of scapula winging your doctor will look at the shoulder blades for any clear obvious signs of winging. Some patient’s scapula bone may be more visible than others and have distinct scapula winging. The doctor may also ask you to perform arm/ shoulder movements to examine the range of movement and stability at the joint.

One of the main tests that are used to aid in the diagnosis of scapula winging is the serratus anterior test. This is where the patient is asked to face a wall, standing about two feet from the wall and then push against the wall with flat palms at waist level. This test is carried out to identify if any damage is done to the thoracic nerve causing the scapula to wing.

Treatment

Treatment for winging scapula is dependent on which muscles or nerve is causing the issue. There are two types of treatment surgical and non-surgical.

Non-surgical treatment (Scapula Winging)

Surgical treatment (Scapula Winging)

One surgical treatment for scapula winging is nerve and muscle transfers. This is a process which involves moving a part of the nerve and muscle to a different portion of the body, this mainly focuses on the neck, shoulder, back and chest areas.

Static stabilization is another form of treatment used to prevent scapula winging, however there is a risk with this treatment that it may return. This procedure uses a sling to attach the scapula to the ribs to add extra stability to the shoulder blade.

Exercises

When performing these exercises aim to do 3 rounds of 15 sets for each exercise. Make sure they are slow and controlled so that it is solely focusing on strengthening the weakened muscles:

  • Scapula retraction
  • External Rotation
  • Horizontal Row
  • Standard press ups
  • Press up on knees (easier version)
  • Angel wings exercise

Prevention

Prevention for scapula winging may not always be possible, however there are procedures you can complete to reduce the risk:

  • Perform exercises to help with posture
  • Try and maintain correct posture positioning
  • Don’t carry anything to heavy on the shoulders and back
  • Do not lift heavy weights at the gym that could cause more damage to the shoulder
  • Strengthen the muscles in the neck and shoulders
  • Perform rehabilitation exercises given by a physiotherapist or doctor
  • Avoid constant repetitive shoulder/ arm movements
  • Rest when needed

If you want to discuss this concern with our specialists then please contact us or make a booking.

Achilles Tendinitis

Achilles tendinitis may occur when overuse or to much strain is placed onto the tendon in the ankle region. The Achilles tendon is situated at the heel of the foot and connects the lower leg muscles of the calf to the heel bone of the ankle.

This pathology is mainly sustained by people who do a lot of running and high intensity exercises. Individuals who may have amplified the time and intensity of their runs, thus potentially leading to Achilles tendinitis. This injury could also occur with a lot of people who play sports such as tennis, netball or basketball, due to the fast pace and explosive movements, causing added pressure onto the ankle joint. If not treated correctly Achilles tendinitis could lead to further complications such as tendon tears or ruptures, which may require surgical repair.

Anatomy

The Achilles tendon, also known as the calcaneal tendon is situated at the back of the ankle. It is a hard band of fibrous tissue that attaches the calf muscles to the calcaneus (heel bone of the ankle). The Achilles tendon is also the largest and strongest in the body.

The two calf muscles; the gastrocnemius and soleus form into one band of tissue, which becomes the Achilles tendon at the lowest point of the calf. A bursa (small sac of fluid) covers the Achilles tendon to help support and protect the area.

When we flex the calf muscles the Achilles tendon pulls onto the heel. This enables us to perform day to day movements such as walking, running and standing on our tip toes. So, it is important to be safe when exercising ensuring the area is protected. The tendon has a limited amount of blood supply, so when we place the tendon under strain or tension it can be more susceptible to injury.

Causes

The main causes for Achilles tendinitis are from repetitive stress and tension placed onto the tendon, it is not usually related to one specific injury cause. Too much pressure on our bodies sometimes can be harmful and extra care should be taken whenever performing any sporting event or exercise activities. Here are some causes of Achilles tendinitis:

  • Tightness in calf muscles
  • Sudden increase in intensity of exercise
  • Longer duration of exercise
  • Unexpected bone growth

Symptoms

Common signs and symptoms of Achilles tendinitis are as follows:

  • Stiffness at the back of the ankle first thing when you wake up
  • Pain along the back of the tendon
  • Sharp pain along the back of the foot
  • Feels different e.g., thicker or tighter
  • Lack of range of movement
  • Severe pain after exercising
  • Swelling around the tendon

When exercising or walking and you feel or hear a loud popping noise, you should see your doctor immediately. As it is highly likely that you may have torn/ ruptured the tendon and will need medical attention.

Diagnosis

If you feel you are suffering with Achilles tendinitis, then it is best you go and see your doctor. The health care professional will palpate (feel) the area to determine the site of pain tenderness and swelling. The doctor will also complete a physical examination assessing flexibility, alignment, reflexes and range of movement around the effected area.

Special imaging test may also be used such as:

  • X-Rays
  • Magnetic Resonance imagining (MRI)
  • Ultrasound

Treatment

Now days there are many treatment theories available for Achilles tendinitis. These could be home treatments, anti-inflammatory medication or surgery.

  • Use the RICE acronym- Rest, Ice, Compress and Elevate the area of injury
  • Reduce physical activity until swelling and pain has reduced
  • Ice the area after exercising when pain has occurred
  • Anti- inflammatory drugs such as aspirin or ibuprofen (however this may just mask the pain)
  • See a sports therapist / physiotherapist for rehabilitation exercises and stretches
  • Wear protective equipment such as a brace to prevent heel movement
  • See a sports therapist and get a sports massage to ease the tension from the calves and plantar on the achilles tendon.

Exercises

Here are a few exercises which may aid in preventing Achilles tendinitis:

  • Calf Raises on Floor
    • Stand with feet hip-width apart.
    • Slowly lift your heels off the ground, then lower them back down. This strengthens the calf muscles and tendon.
  • Single Leg Calf Raises
    • Stand on one leg.
    • Lift your heel off the ground, then slowly lower it. This targets each calf individually and enhances strength and stability.
  • Calf Raises on Elevated Bench
    • Stand with the balls of your feet on the edge of a step or bench.
    • Rise onto your toes, then lower your heels below the step level. This increases the stretch and strengthens the calf muscles more effectively.
  • Lunge Calf Stretch
    • Step one foot forward into a lunge position, keeping the back leg straight and heel on the ground.
    • Push your hips forward to stretch the calf muscle of the back leg.
  • Resistance Band Calf Stretch
    • Sit with your leg extended and a resistance band looped around the ball of your foot.
    • Pull the band towards you while keeping your leg straight to stretch the calf muscle.
  • Resisted Plantarflexion
    • Sit with your foot flexed and a resistance band around the ball of your foot.
    • Push your foot down against the band, then slowly return to the starting position. This strengthens the calf muscles and tendon.
  • Walking on Tip Toes
    • Walk around on your tiptoes for a few minutes. This exercise helps to improve calf strength and flexibility.

Prevention

It may not be possible to full prevent Achilles tendinitis from occurring, however you can incorporate certain measures to reduce the risk factors:

  • Don’t over do exercise, make sure to have rest days and include full warm ups before exercising
  • Increase intensity levels of exercise progressively
  • Make sure you are wearing the correct footwear
  • Stretch daily, and even more importantly before and after exercising
  • Perform specific exercises to strengthen the calf muscles
  • Complete non weight bearing exercise such as swimming to reduce pressure onto the Achilles tendon.

If you think you may have achilles tendinitis or would like to find out if you have it, please contact a member of our team today or make a booking online.